Jupyter Notebook on Google Cloud
26 November 2021
When it comes to tackling real-world predictive modeling projects, cloud computing, and machine learning go hand in hand. Whether you prefer Google Cloud, Amazon Web Services, or Azure, hosting your Jupyter notebooks in the cloud offers unparalleled flexibility and scalability.
In this comprehensive guide, I’ll walk you through a step-by-step approach to quickly configuring a fully functional Jupyter Notebook on Google Cloud. Here are the three key steps involved in this project:
1) Configure a virtual machine instance (Ubuntu OS) on Google Cloud.
2) Initiate Jupyter Notebook on the Virtual Machine.
3) Schedule and run Python scripts.
So, let’s dive in and see how we can swiftly supercharge data analysis and machine learning projects in the cloud!
Step 1: Set up a Virtual Machine Instance with Ubuntu OS on Google Cloud:
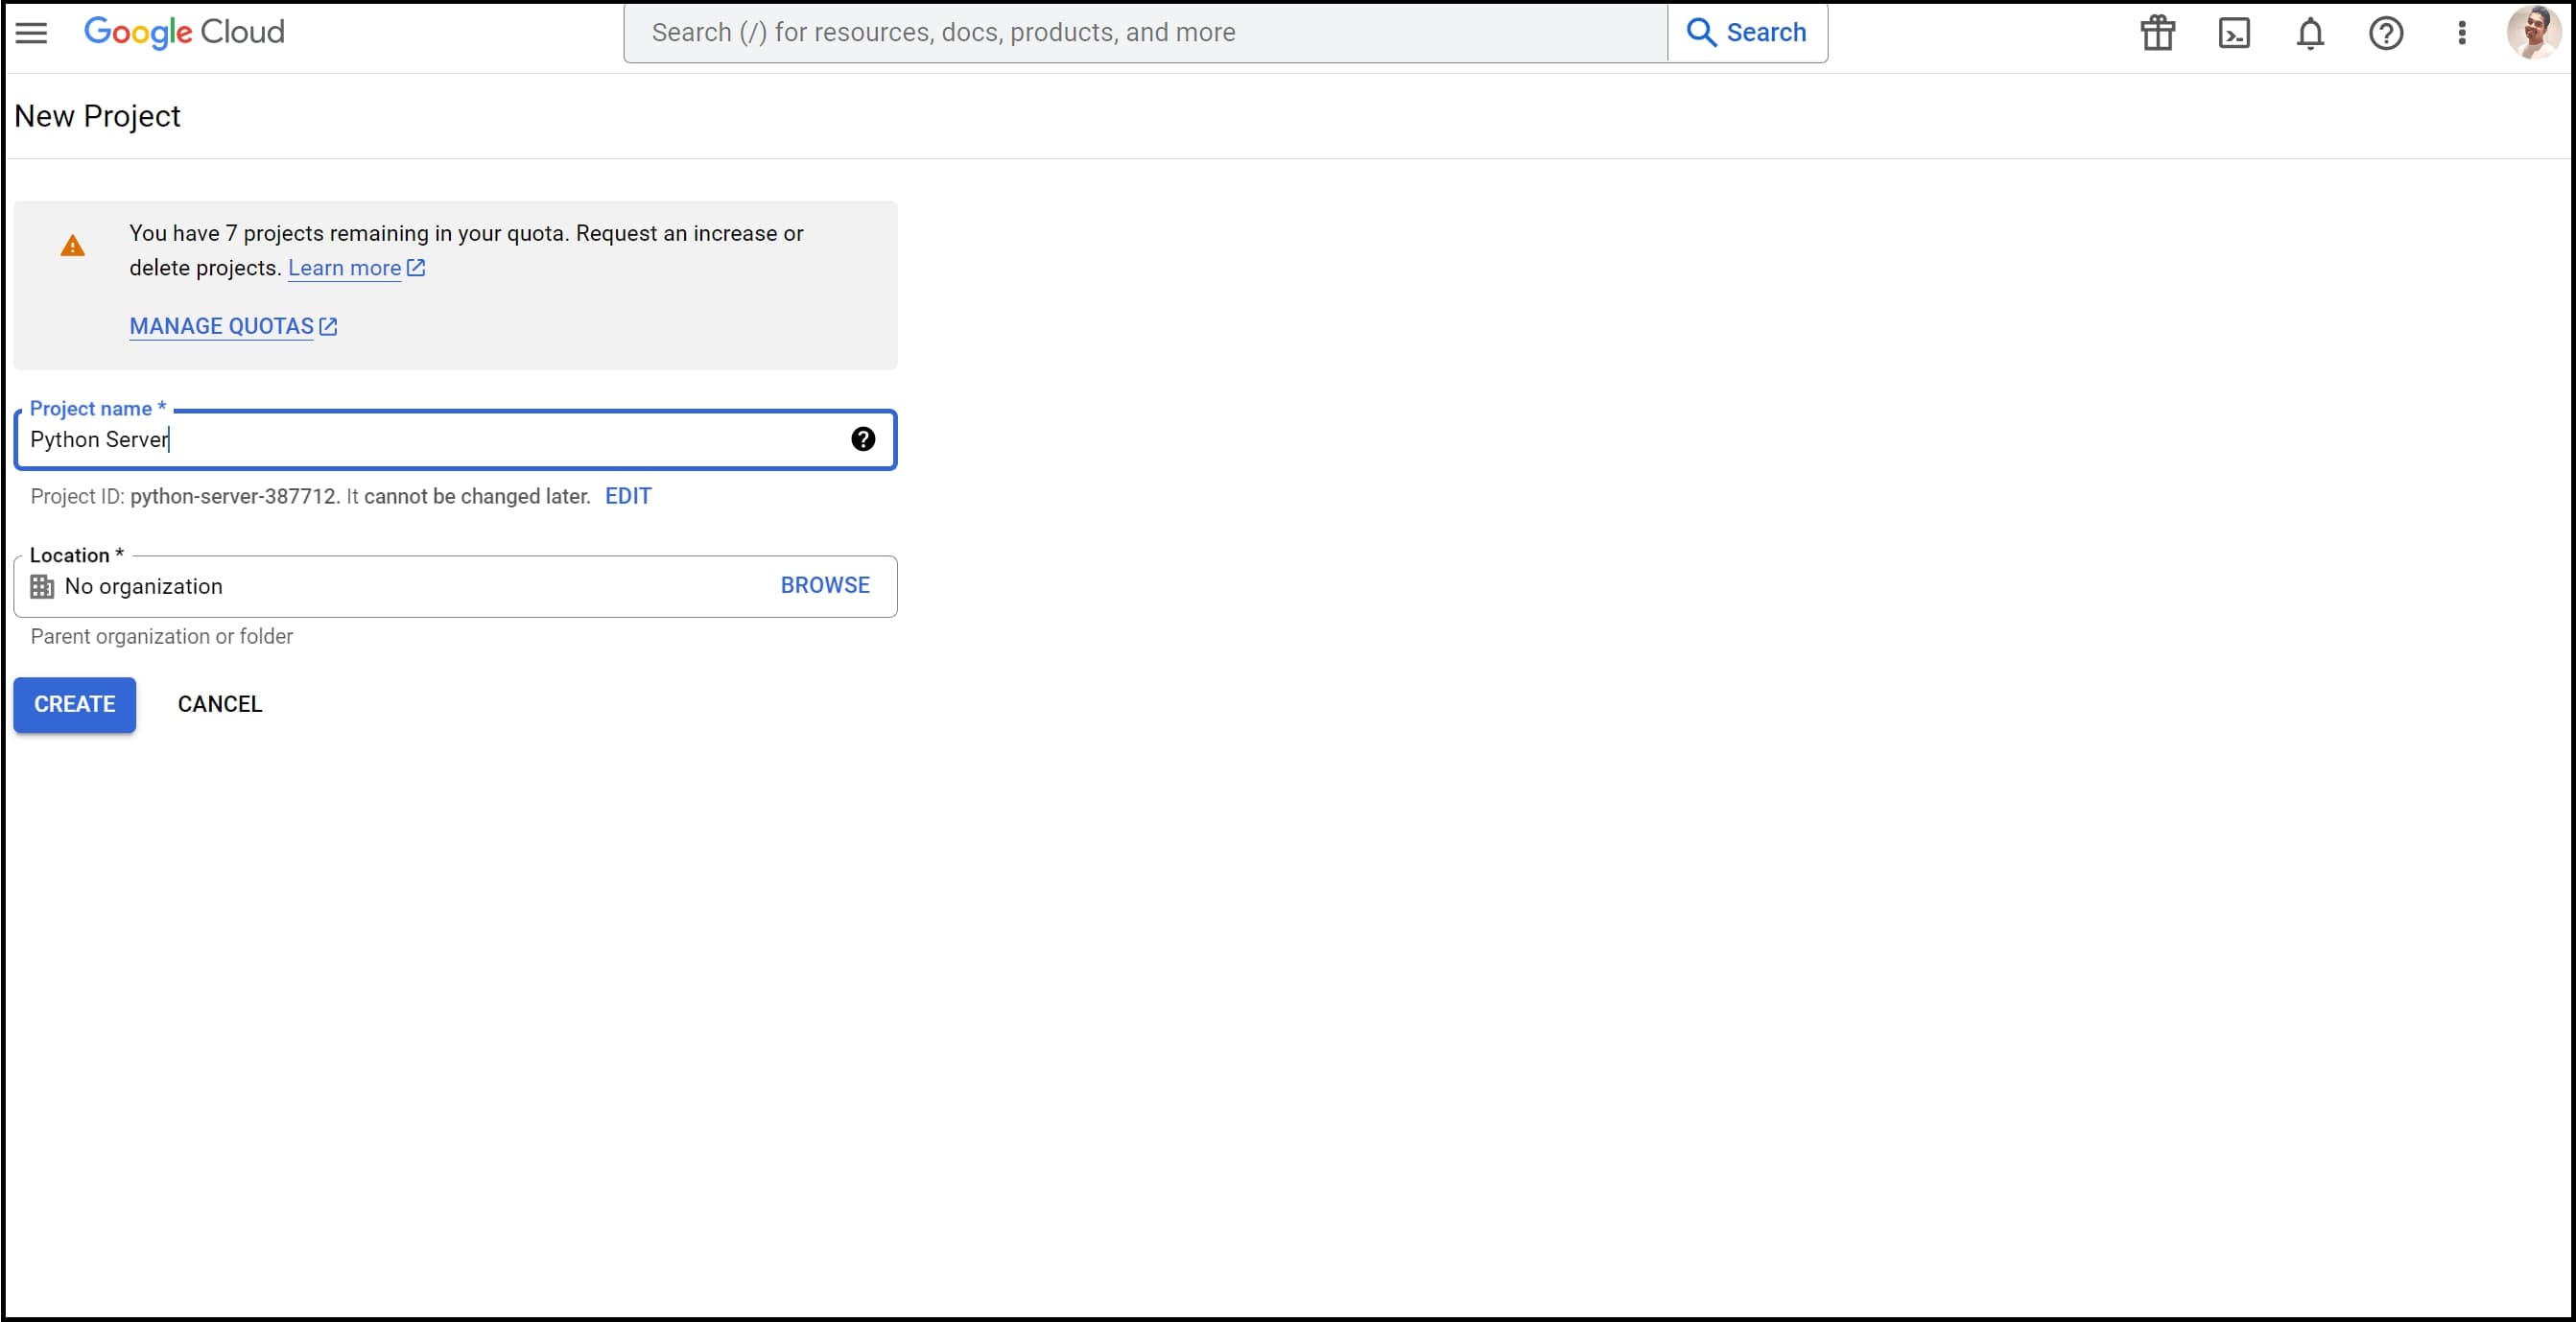
Step 1.1. Create a Google Cloud Project: Sign in to Google Cloud Console and initiate a new project.
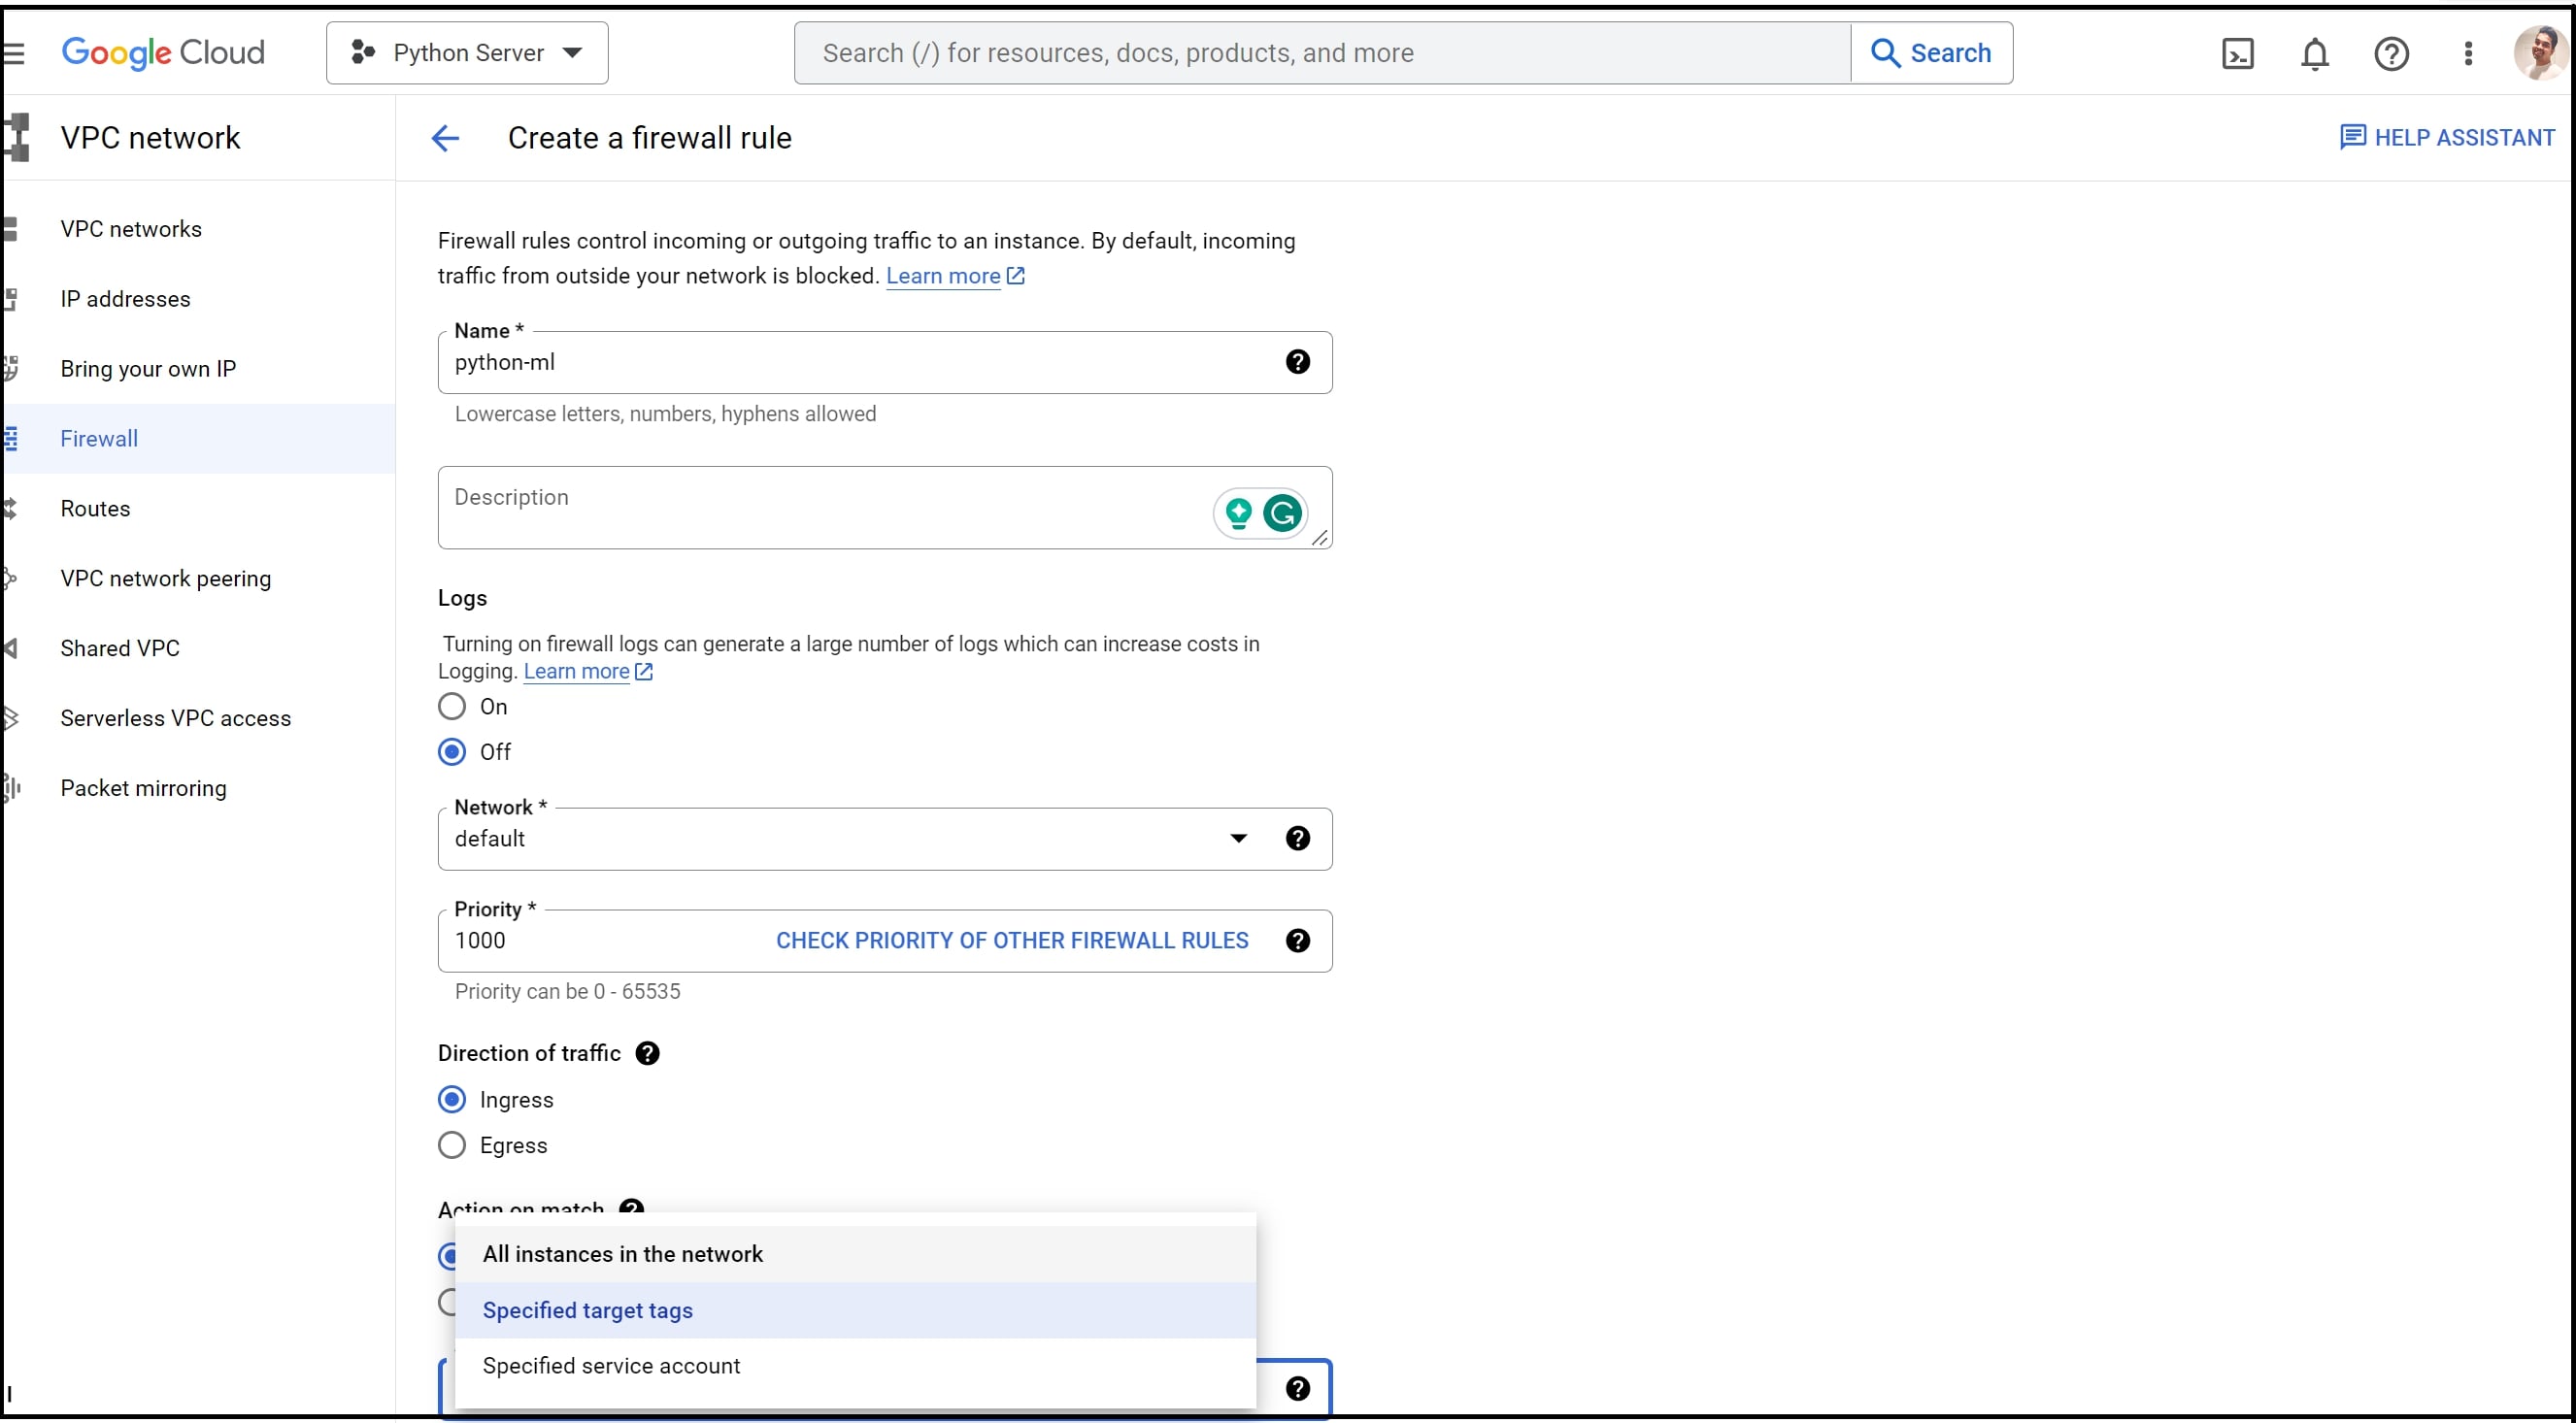
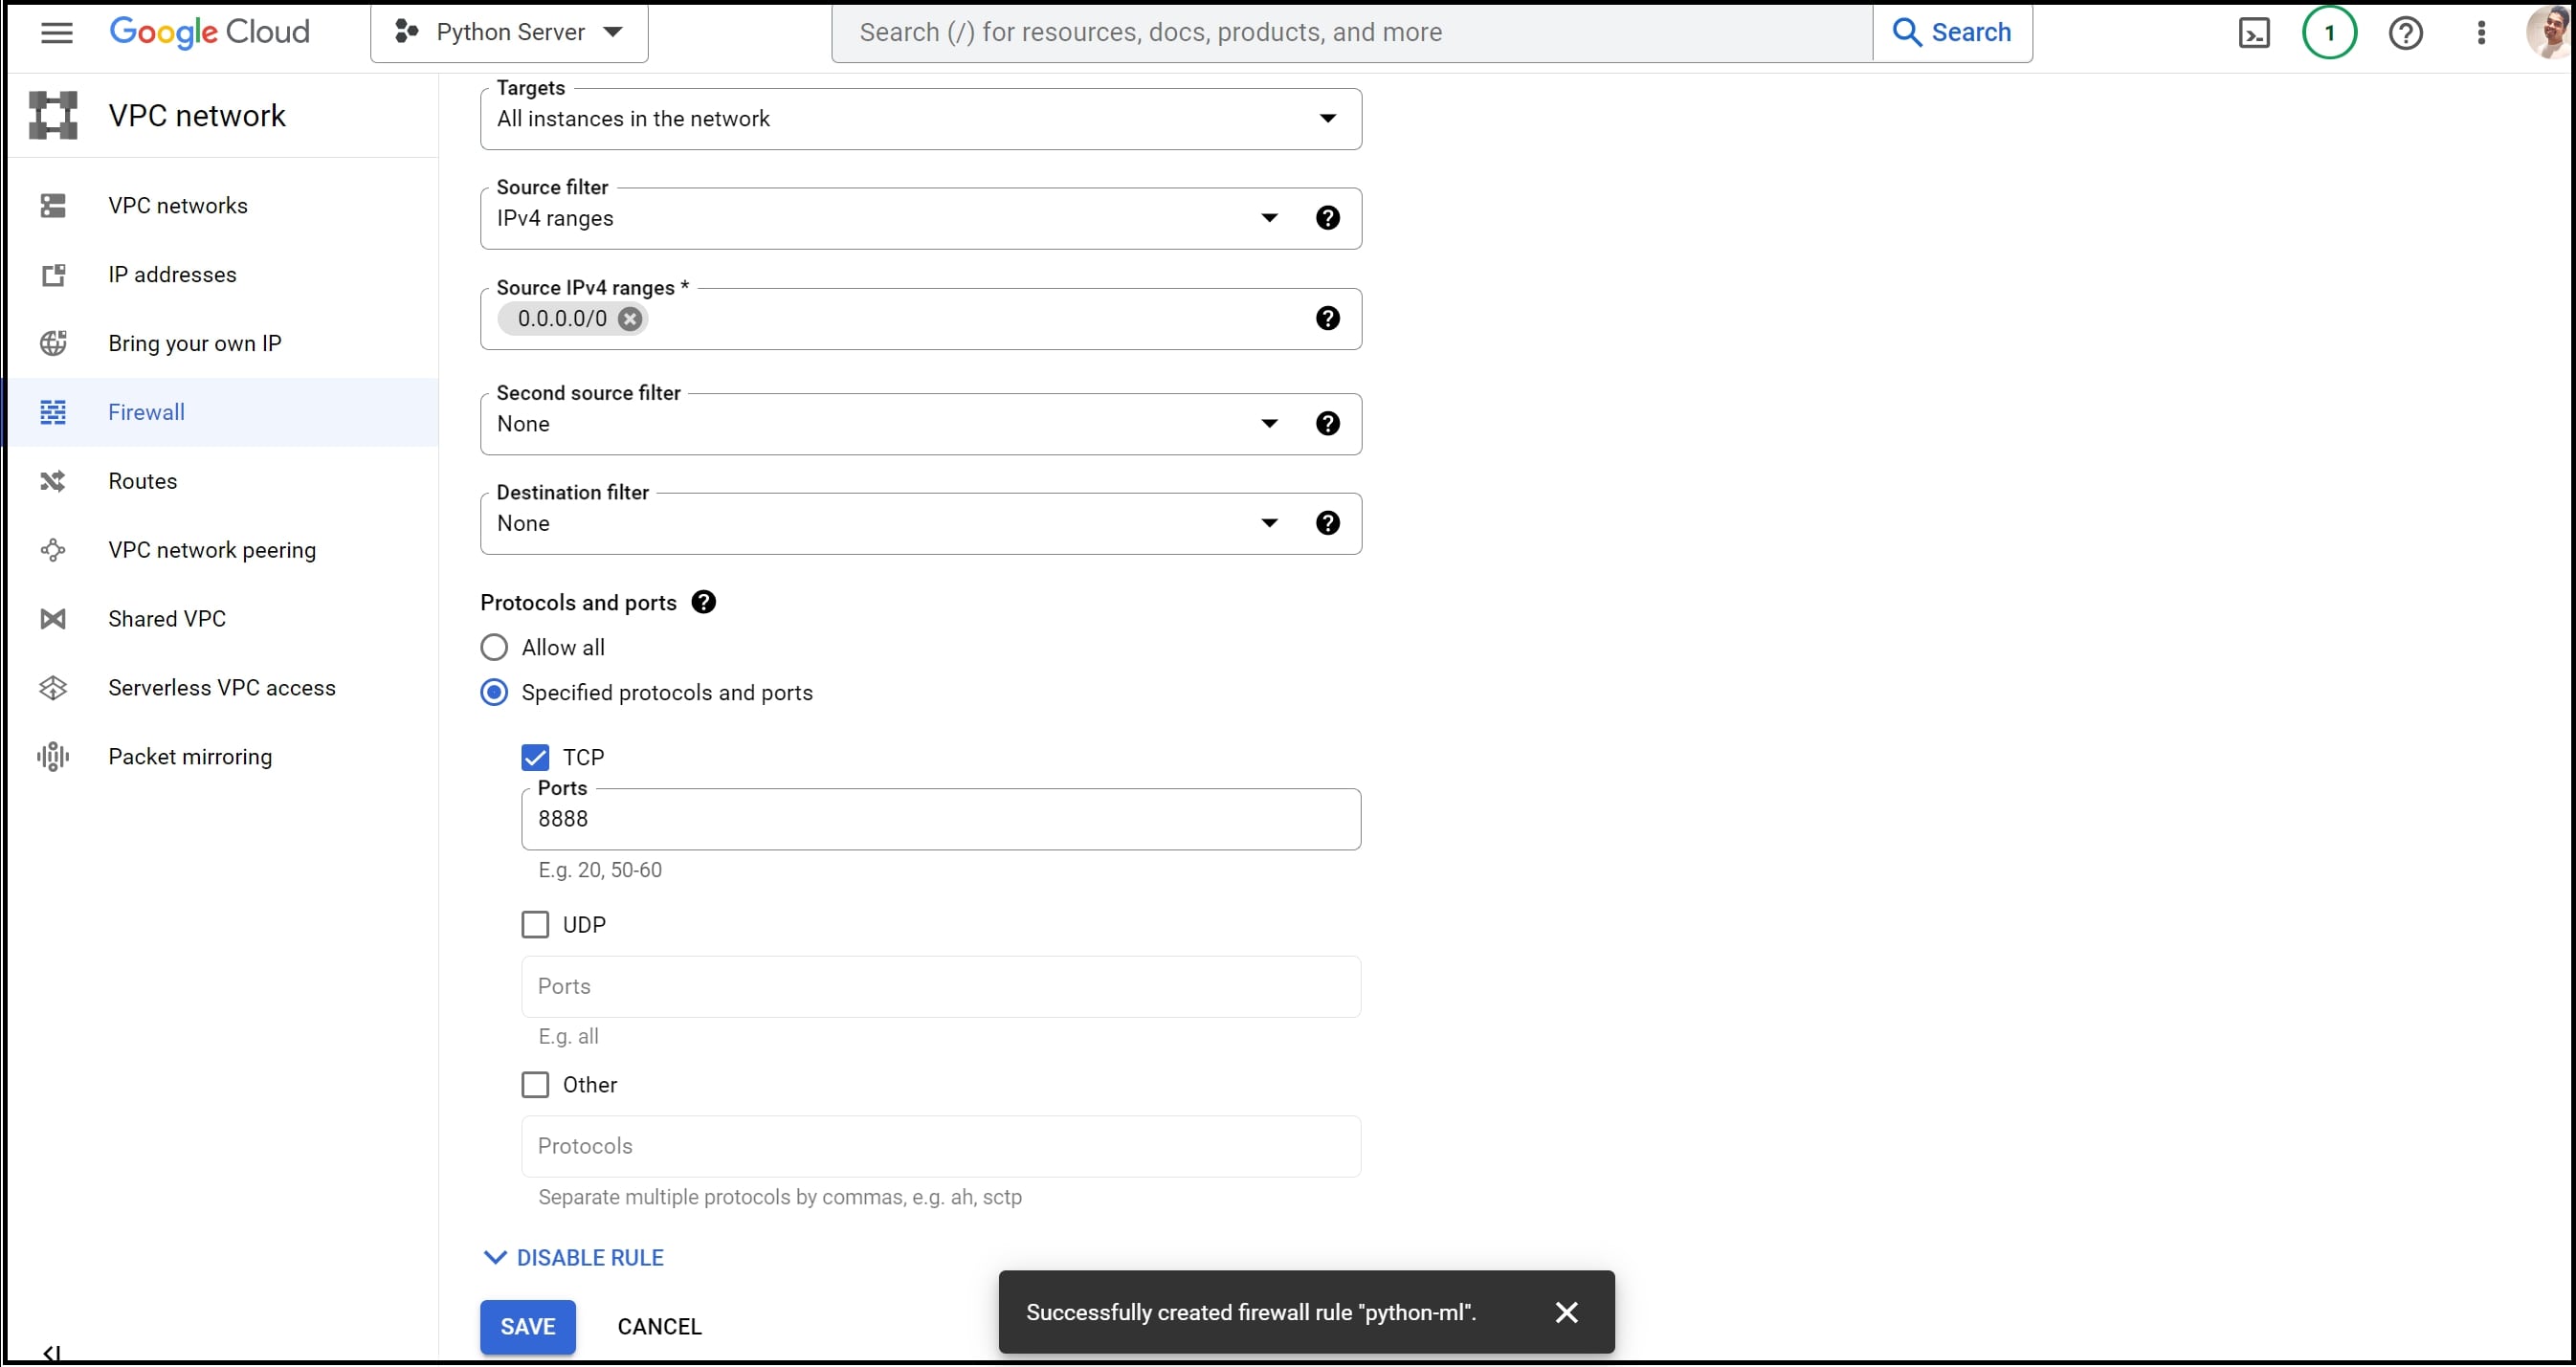
Step 1.2: Establishing a Firewall Rule: To set up a firewall rule within Google Cloud Compute Engine, follow these steps: Go to the ‘VPC Network’ section in the menu, and select ‘Firewall’. Proceed to configure the desired settings as outlined below:
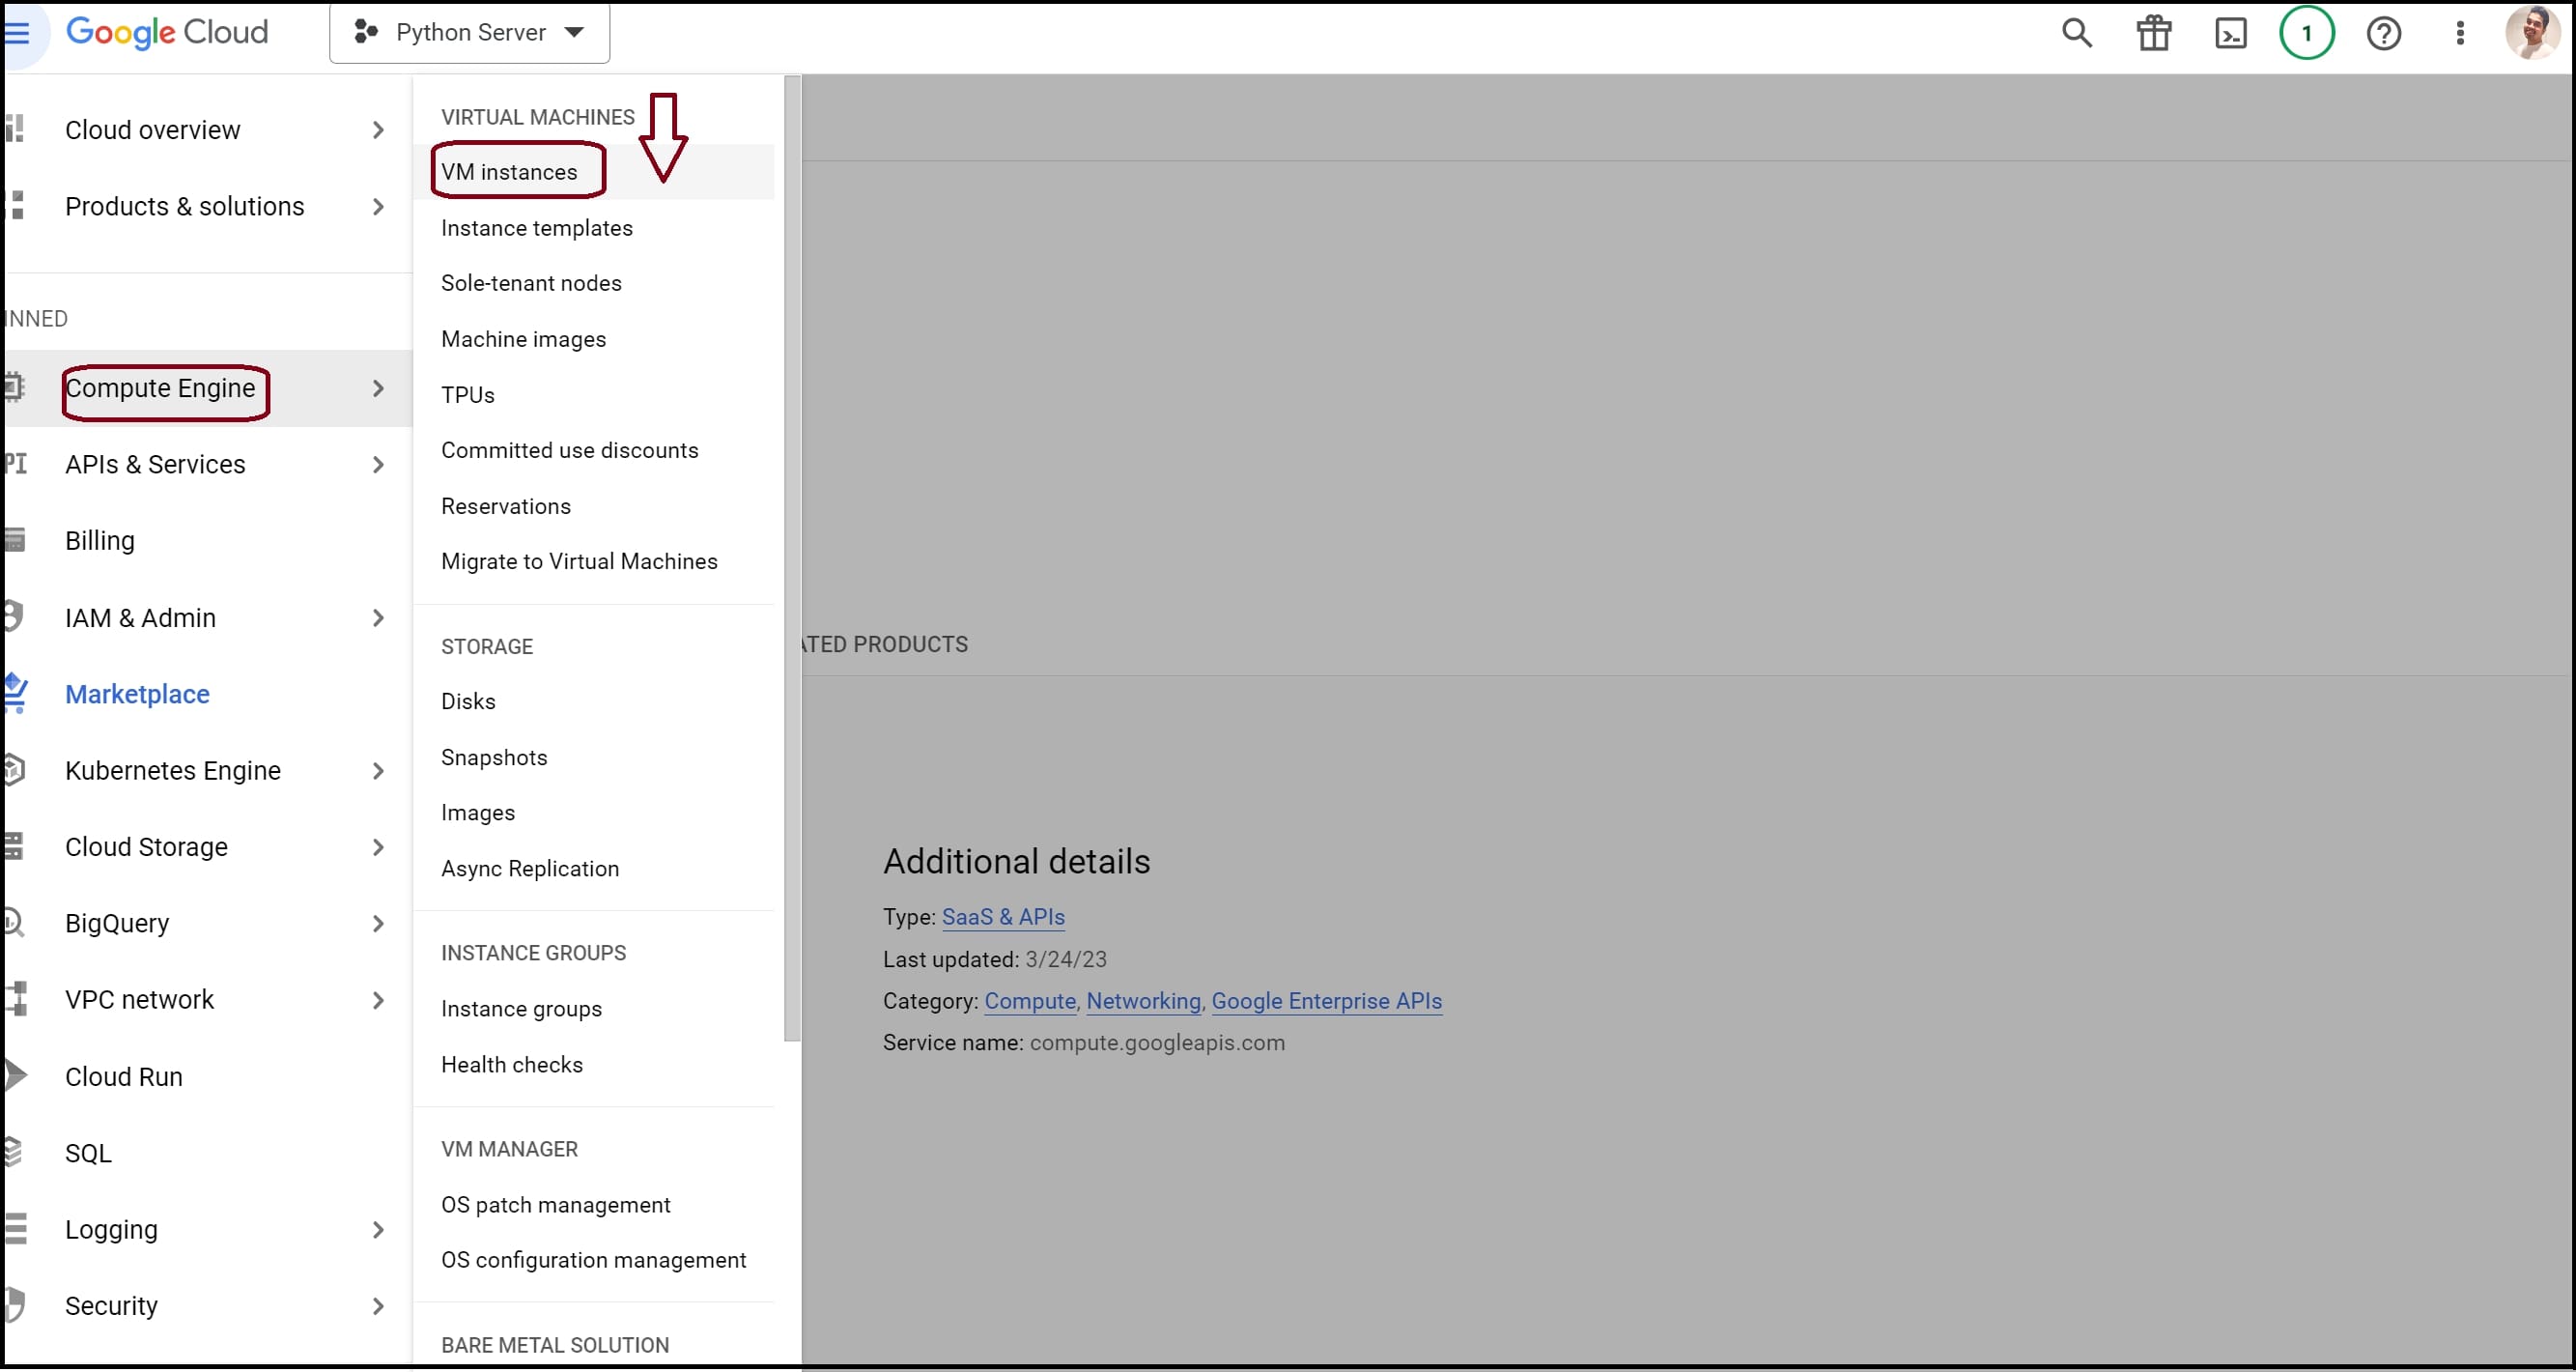
Step 1.3 Create a Virtual Machine Instance: Create a new virtual machine on Google Cloud by navigating to ‘VM Instances’ under ‘Menu’ > ‘Compute Engine’.
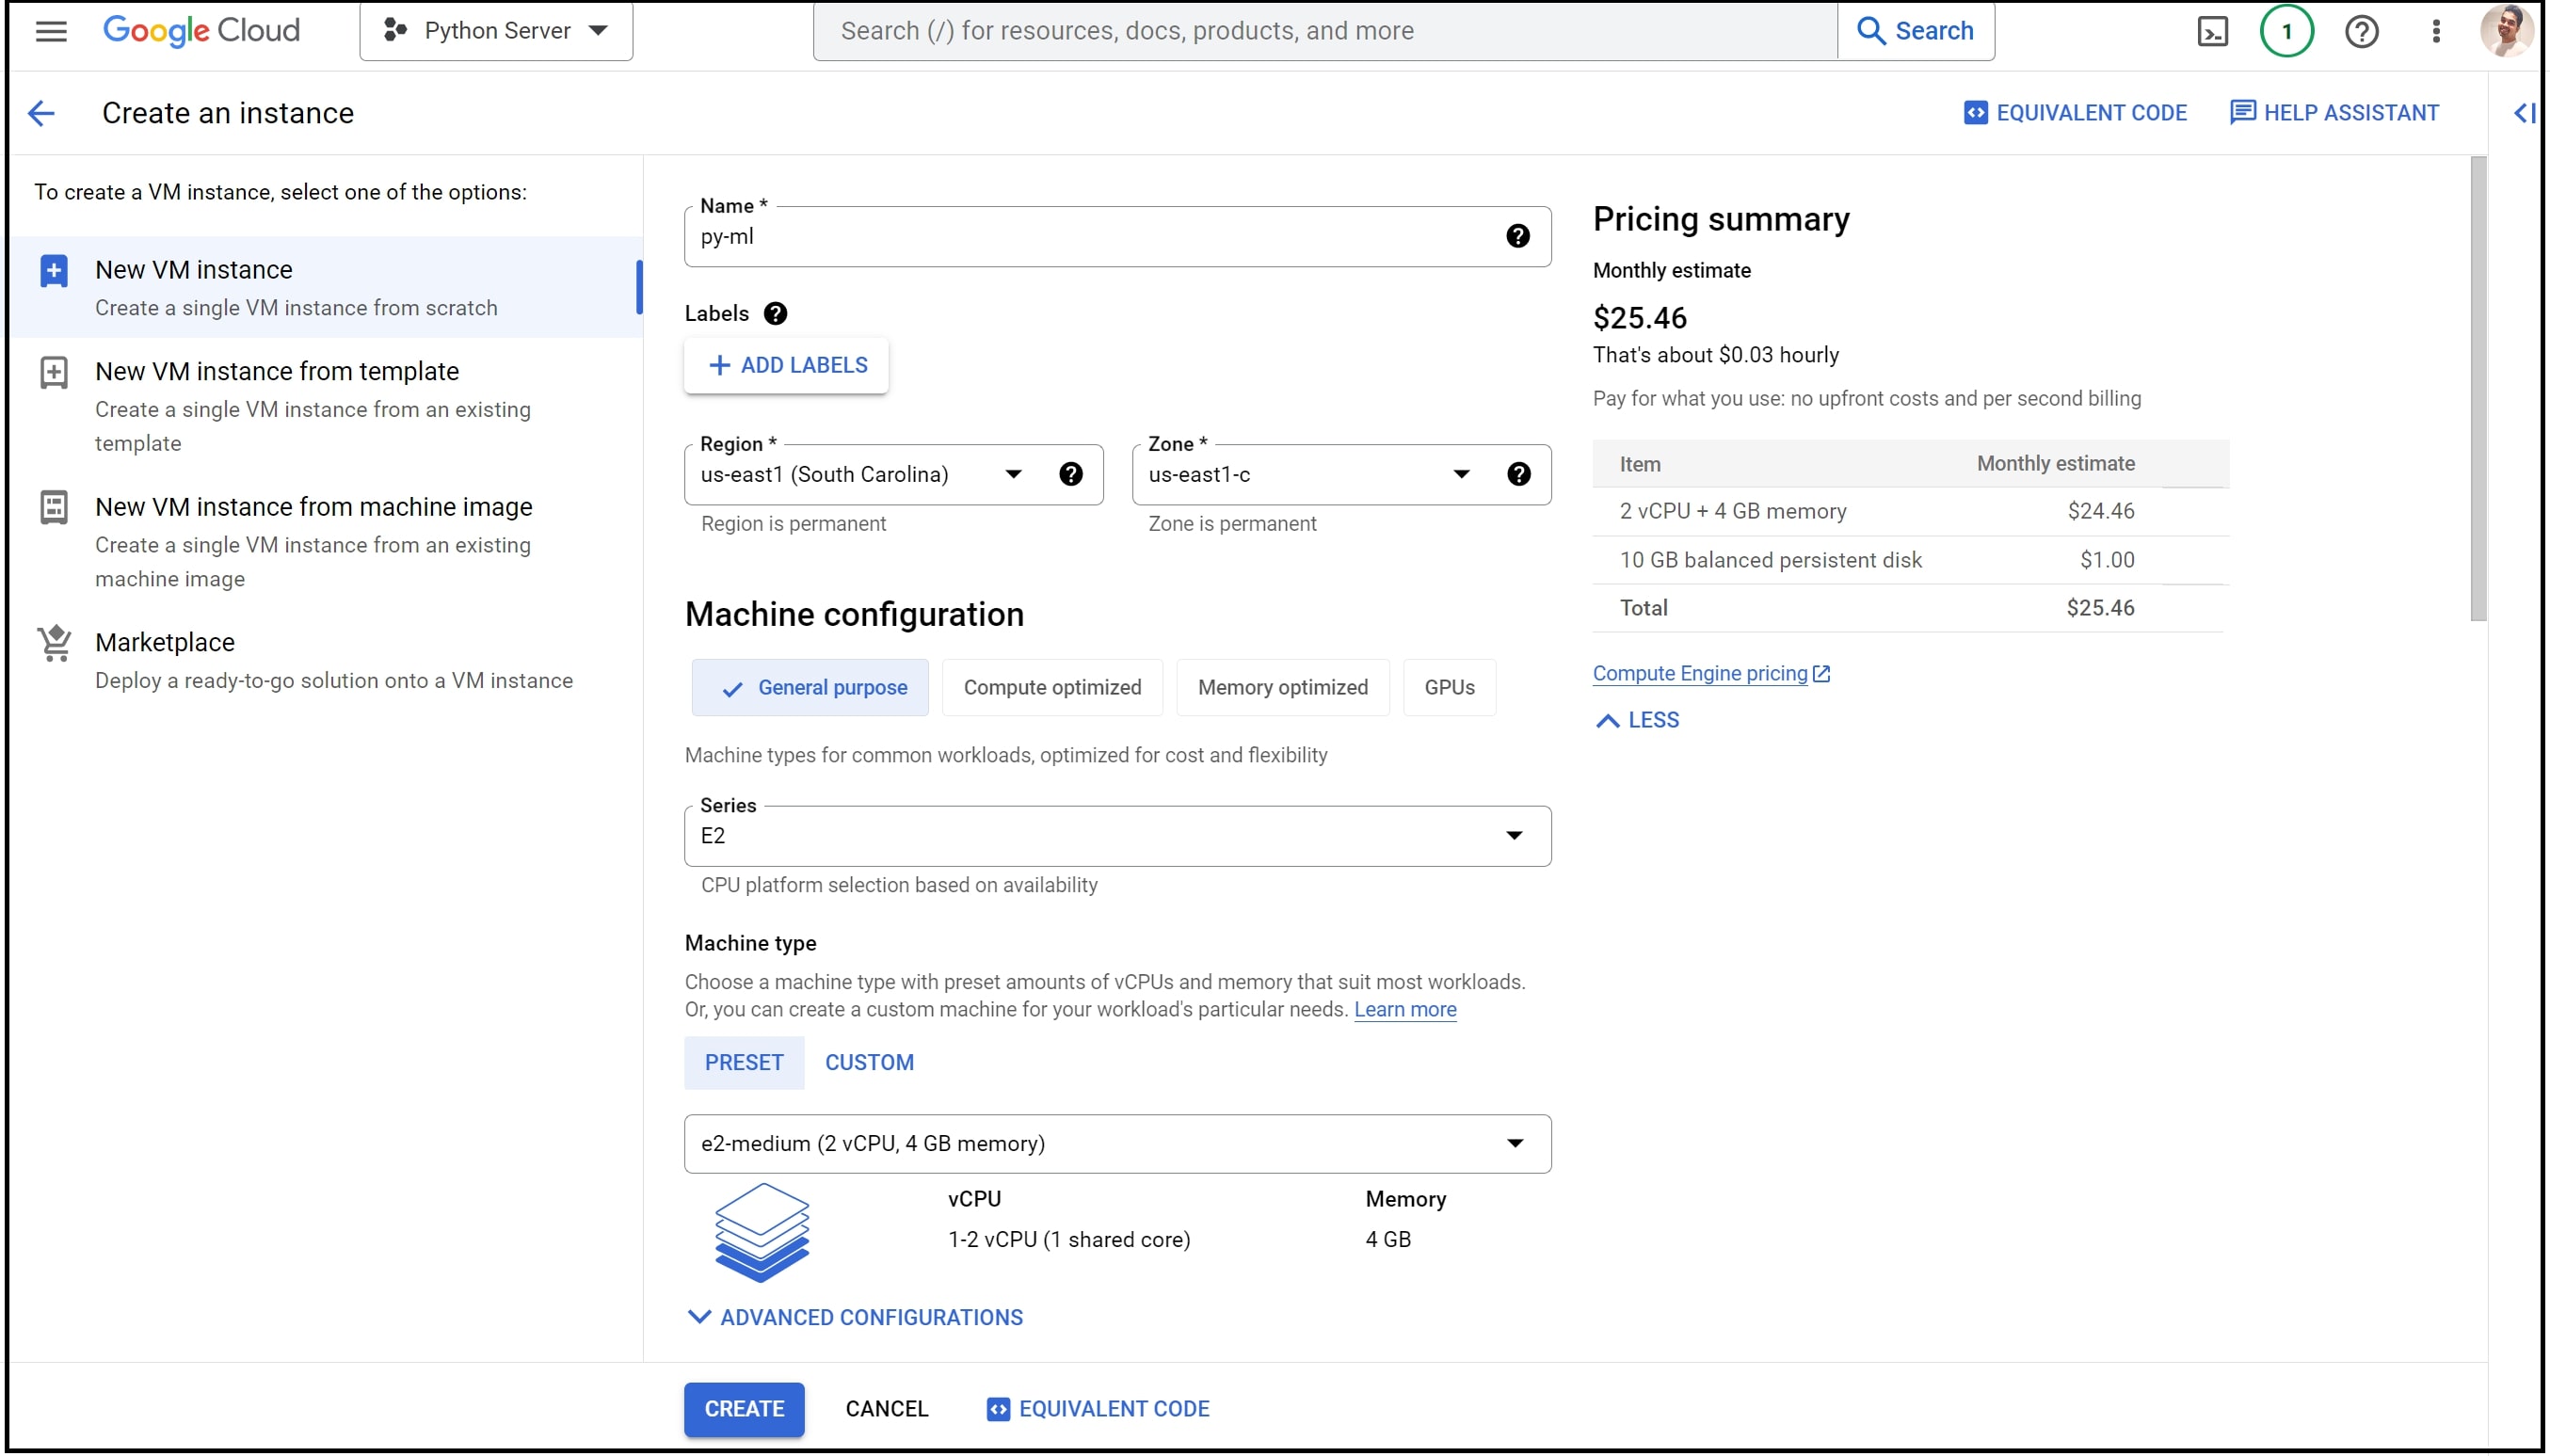
Step 1.4. Configuring the Virtual Machine: Provide a name for the new VM instance, such as “py-ml,” and select a zone that is geographically close to the operational zone to minimize network latency.
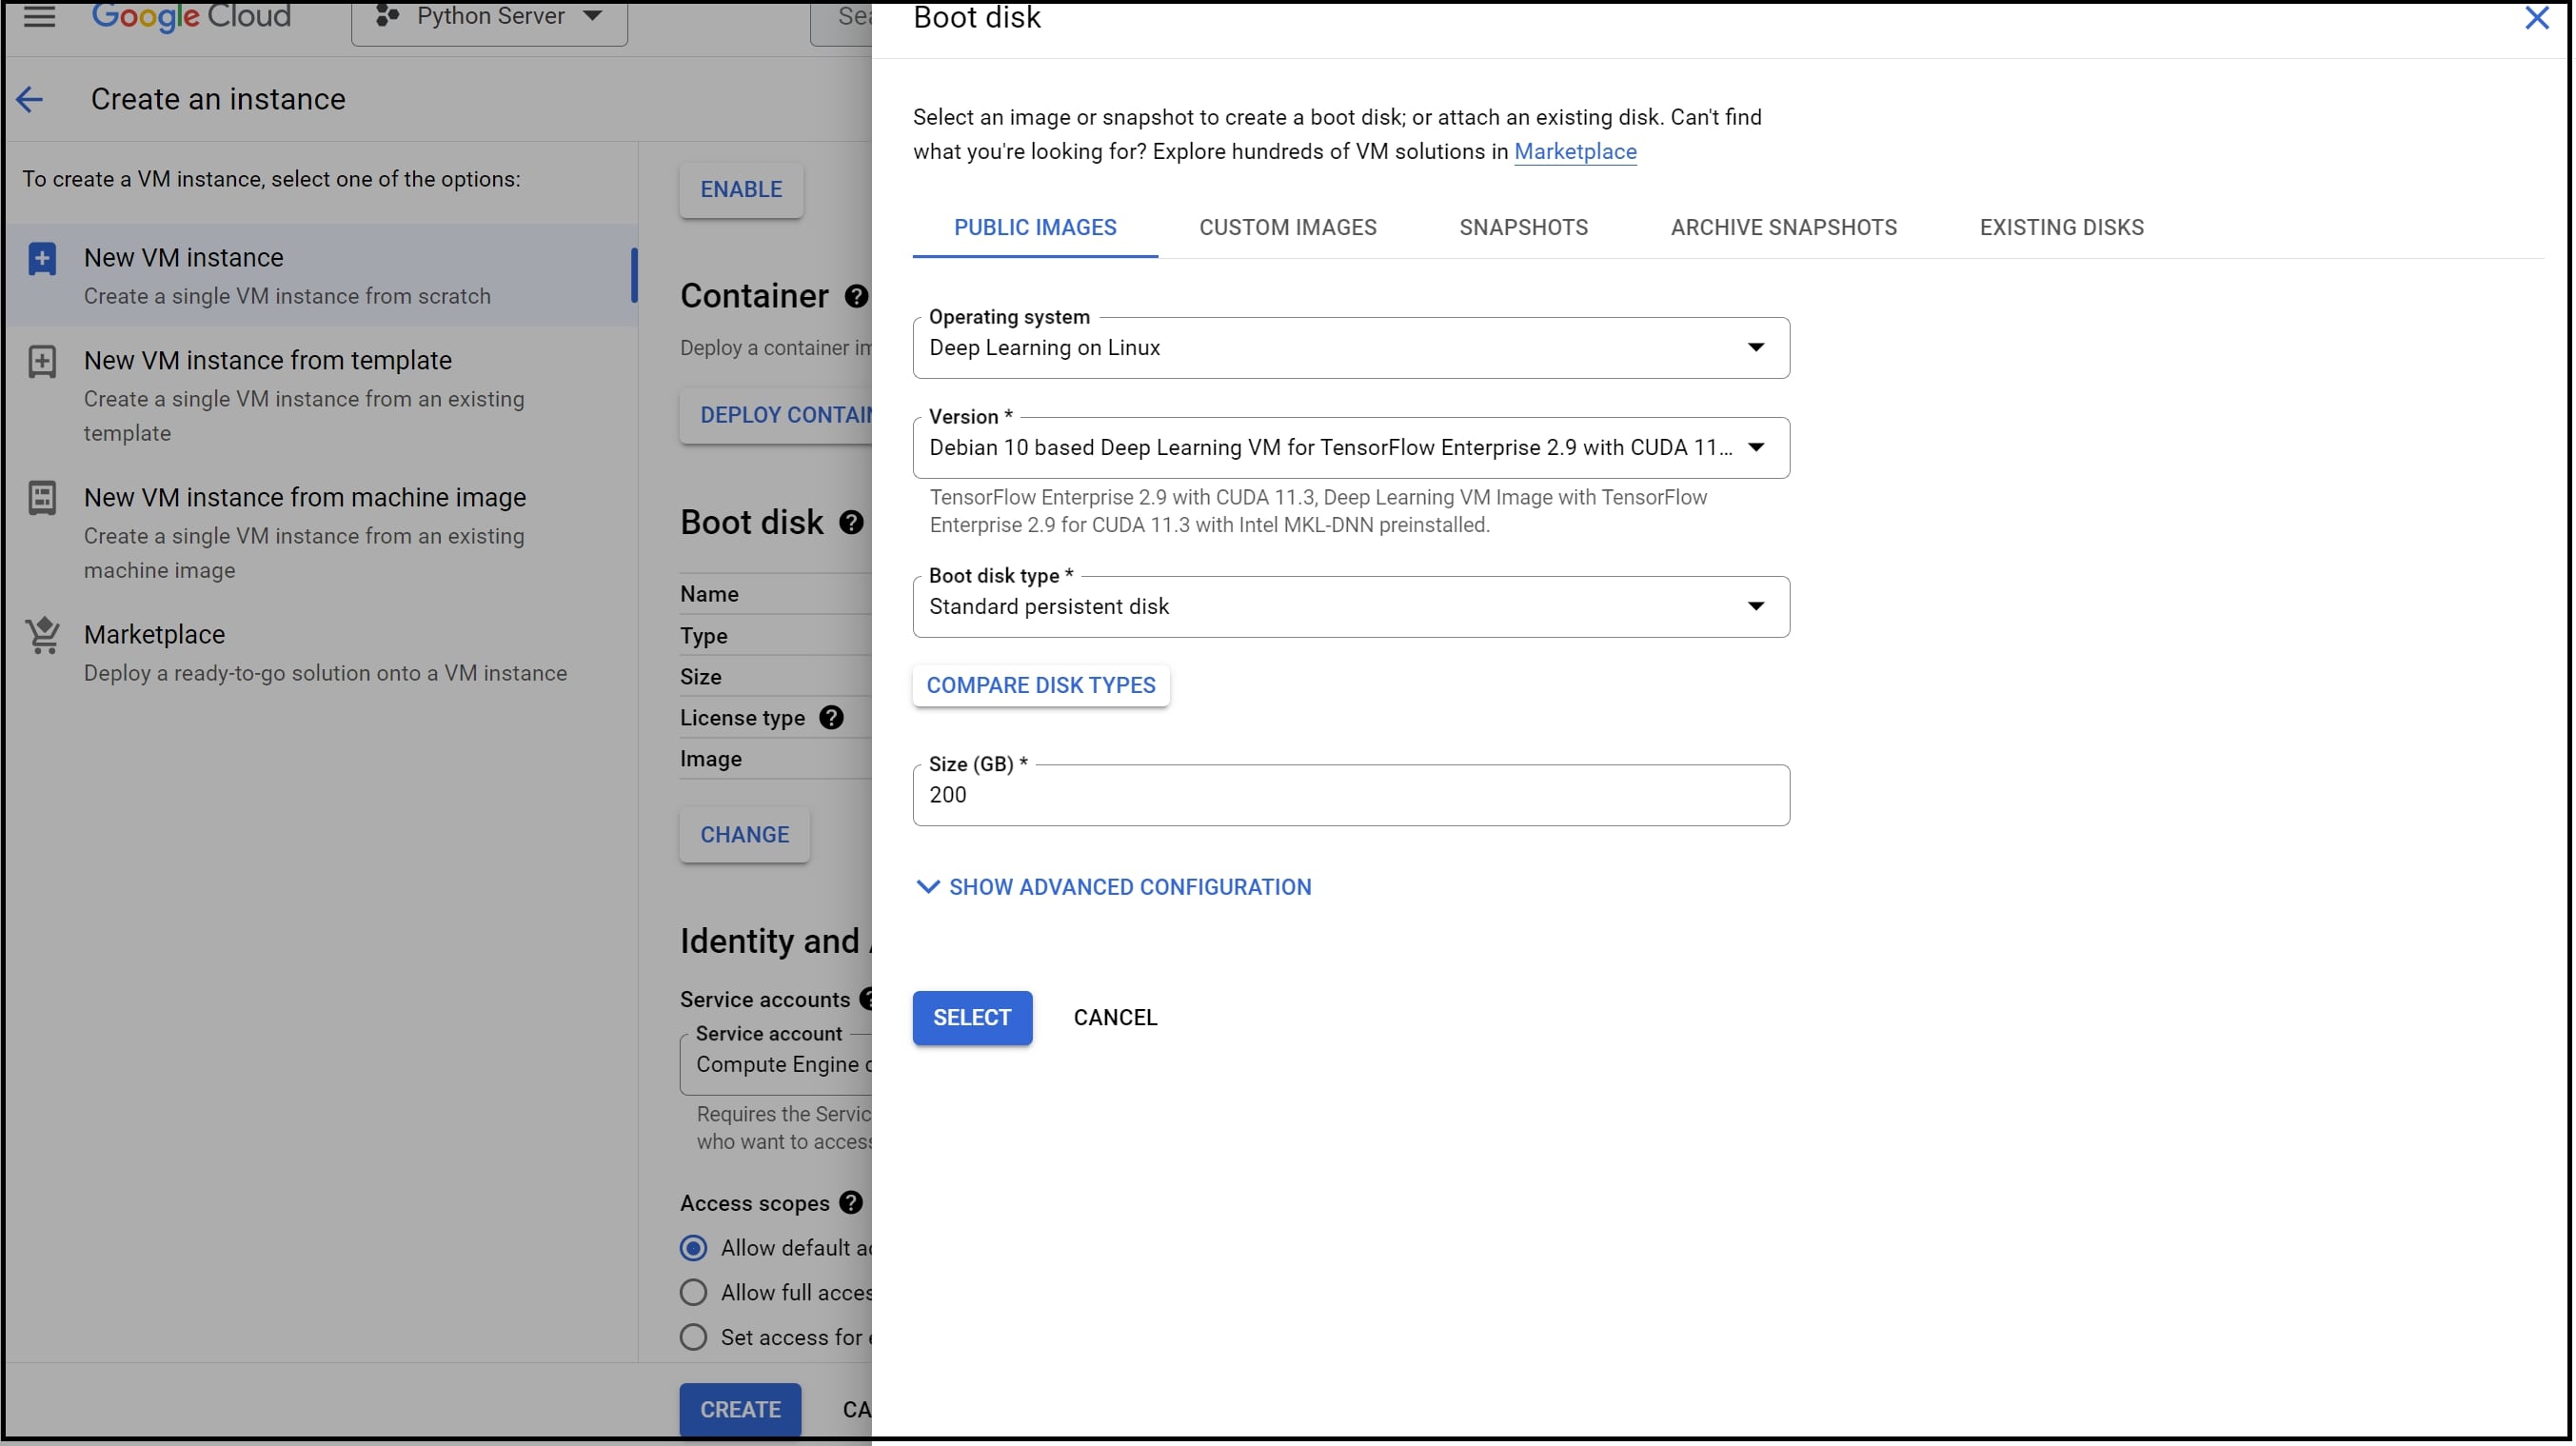
Edit the Boot Disk and choose one of the most recent Deep Learning VMs with a standard persistent disk Boot disk type and a size of 200 GB. Then, make sure that the firewall allows HTTP and HTTPS traffic. Finally, click on ‘Create’ to initiate the instance launch.
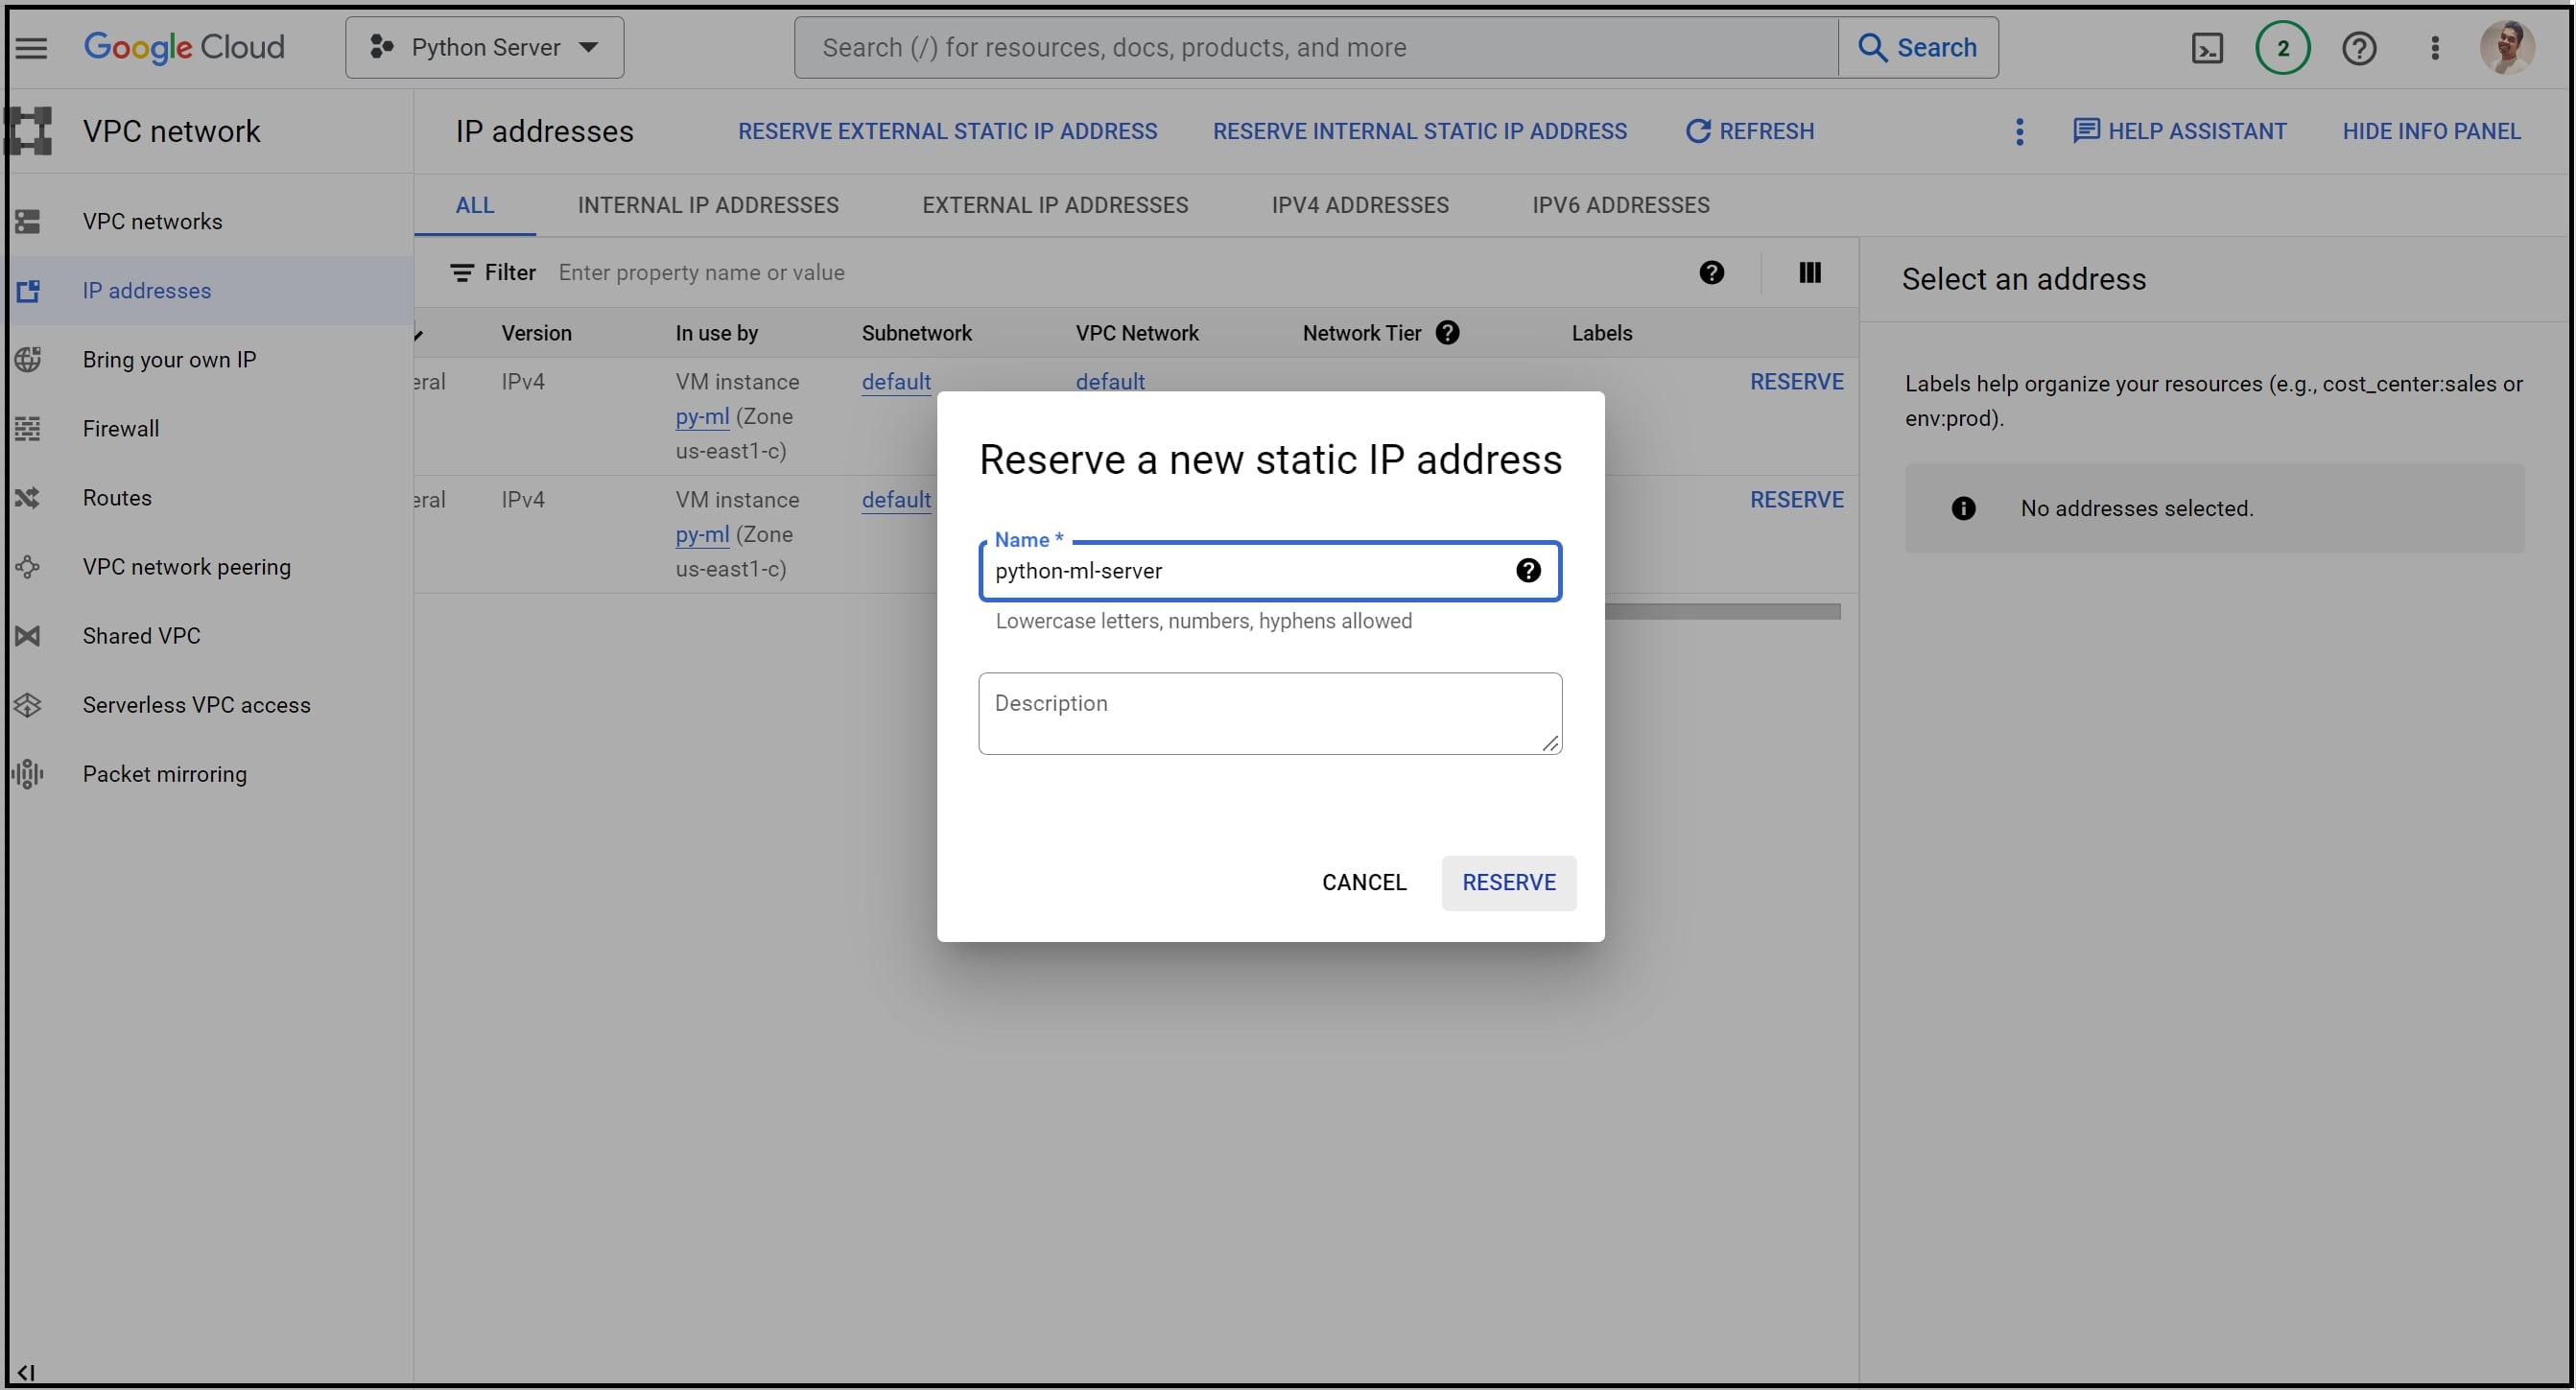
Step 1.5. Reserve External Static IP Address: As the final step of VM instance configuration, navigate to ‘IP addresses’ within the ‘VPC network’ and ‘reserve’ a new static IP address for your newly created virtual machine instance.
Step 2. Initiate Jupyter Notebook on the Virtual Machine:
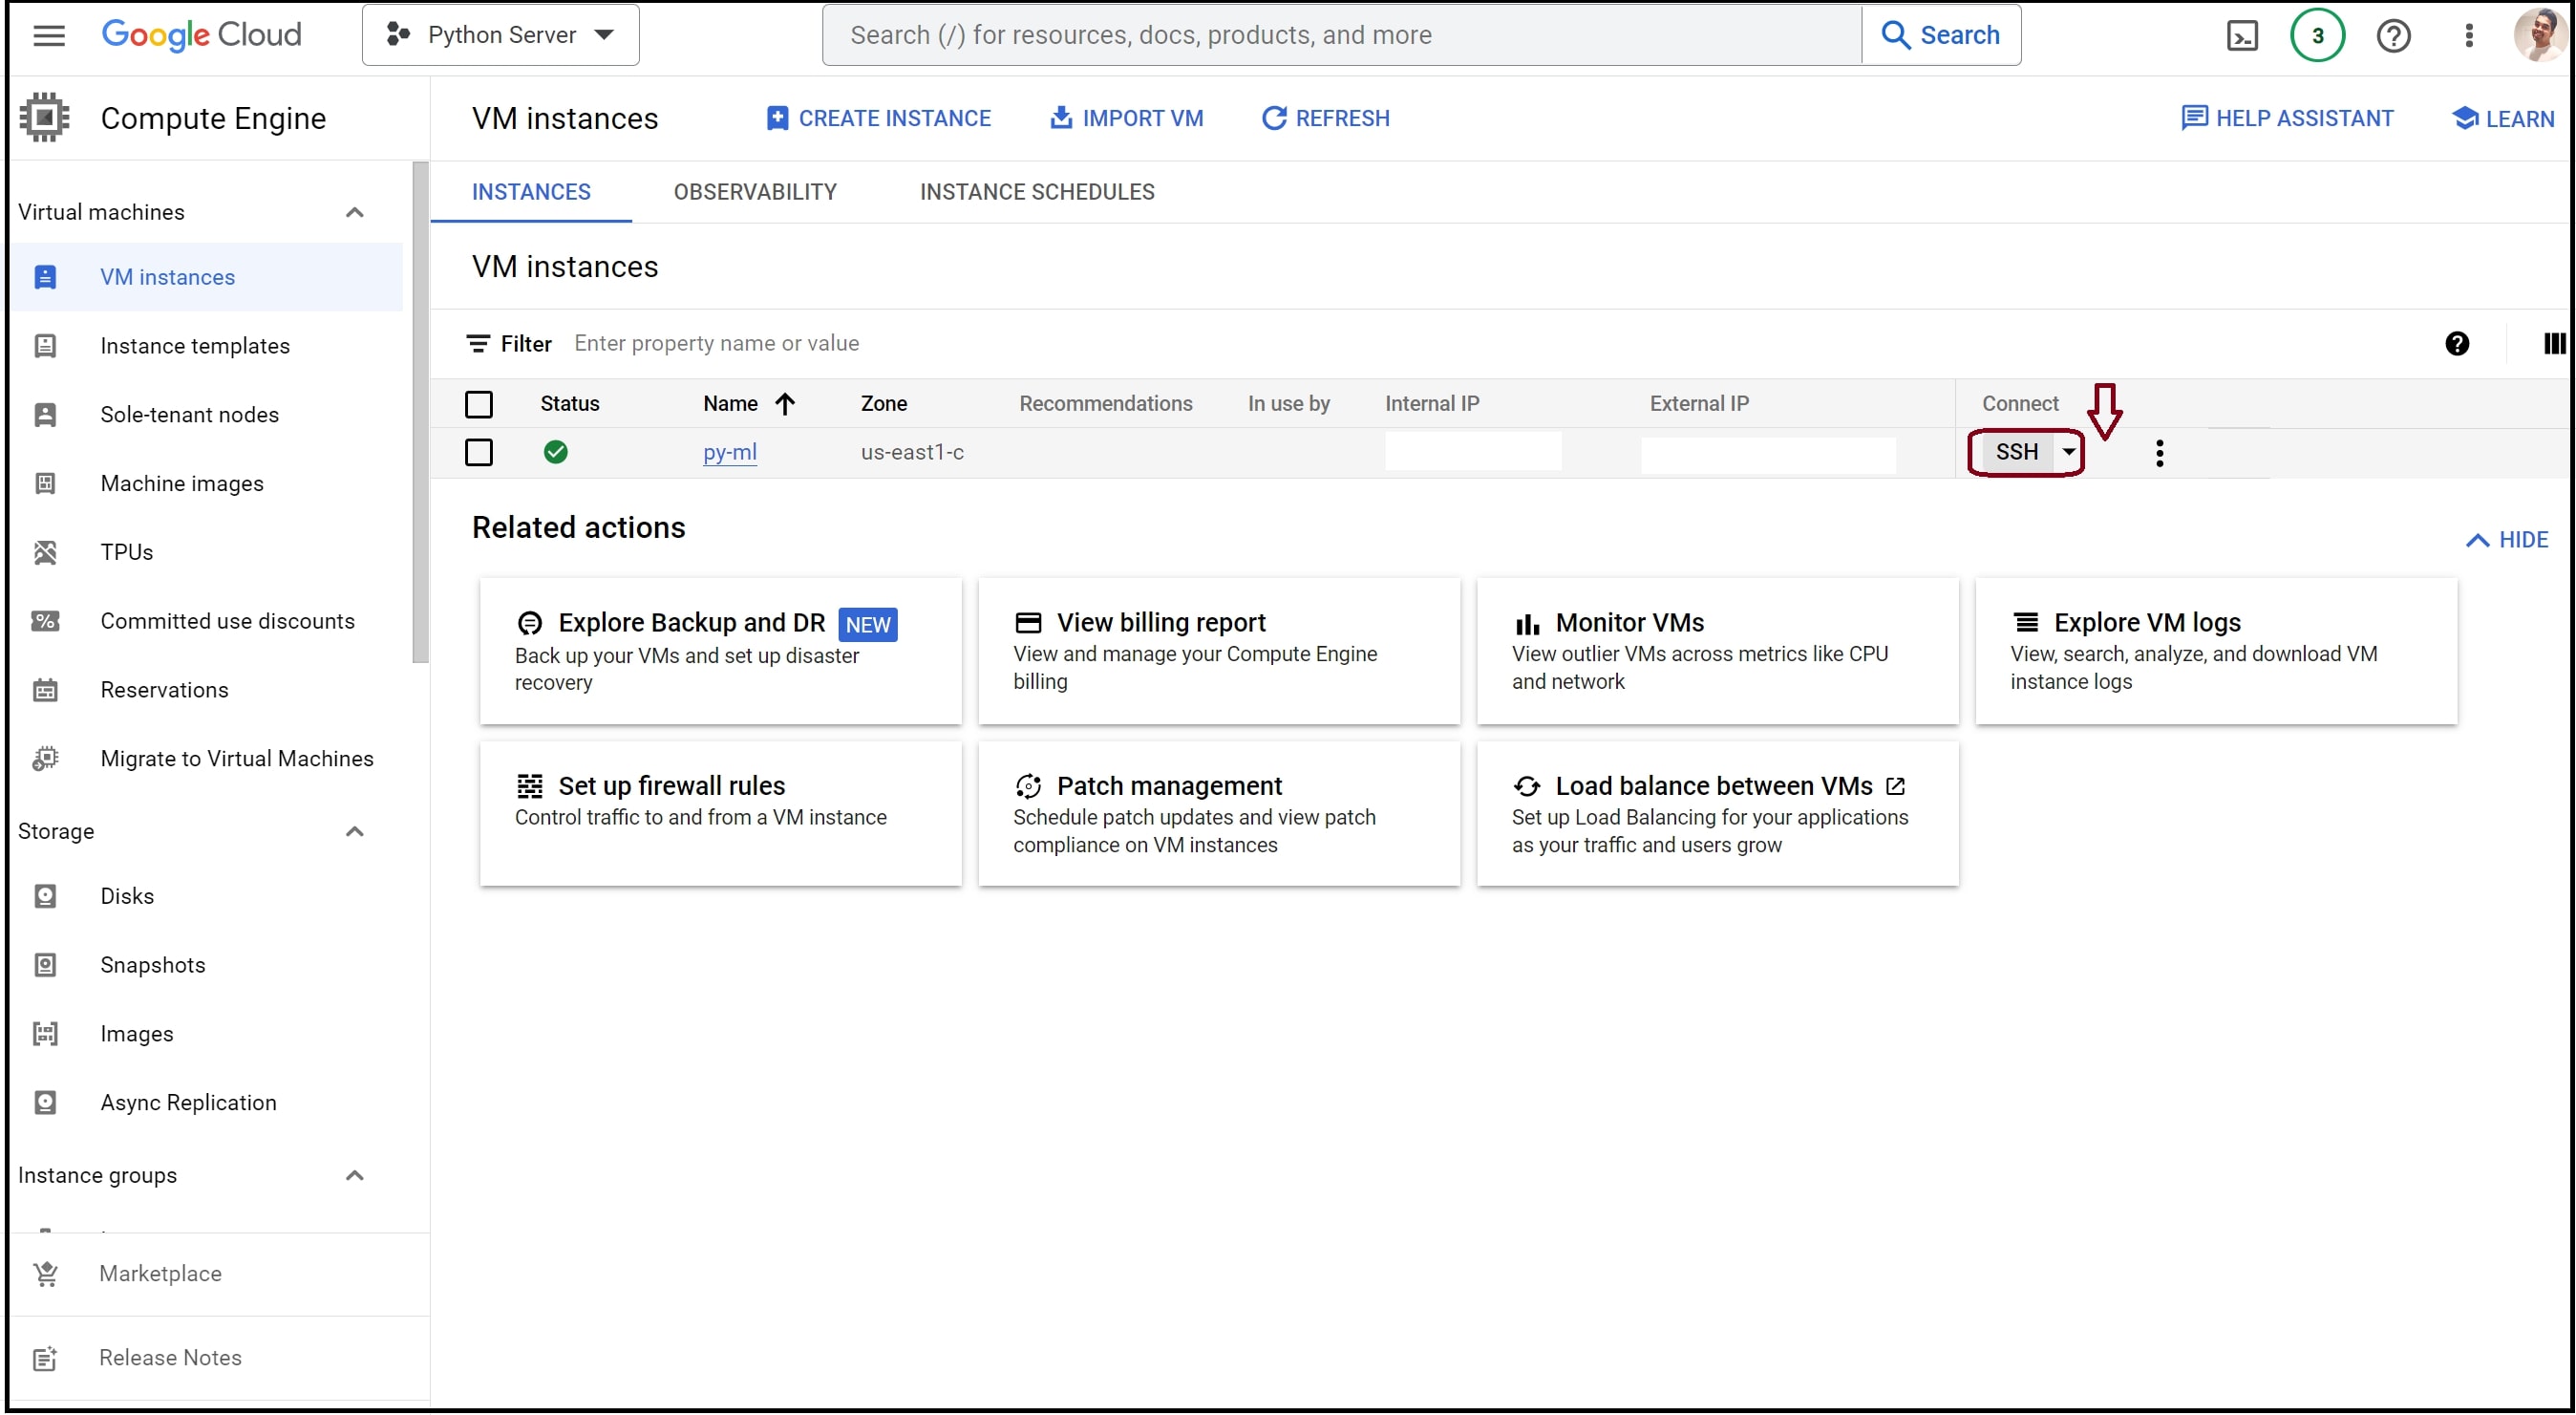
Step 2.1: Establish an SSH Connection: Select the ‘SSH’ option next to the newly created instance in the VM instances window of Google Compute Engine. This will open the command prompt.
Step 2.2: Initiate Jupyter Notebook: SSH the following command ‘jupyter notebook - ip=0.0.0.0 - port=8888 - no-browser &’
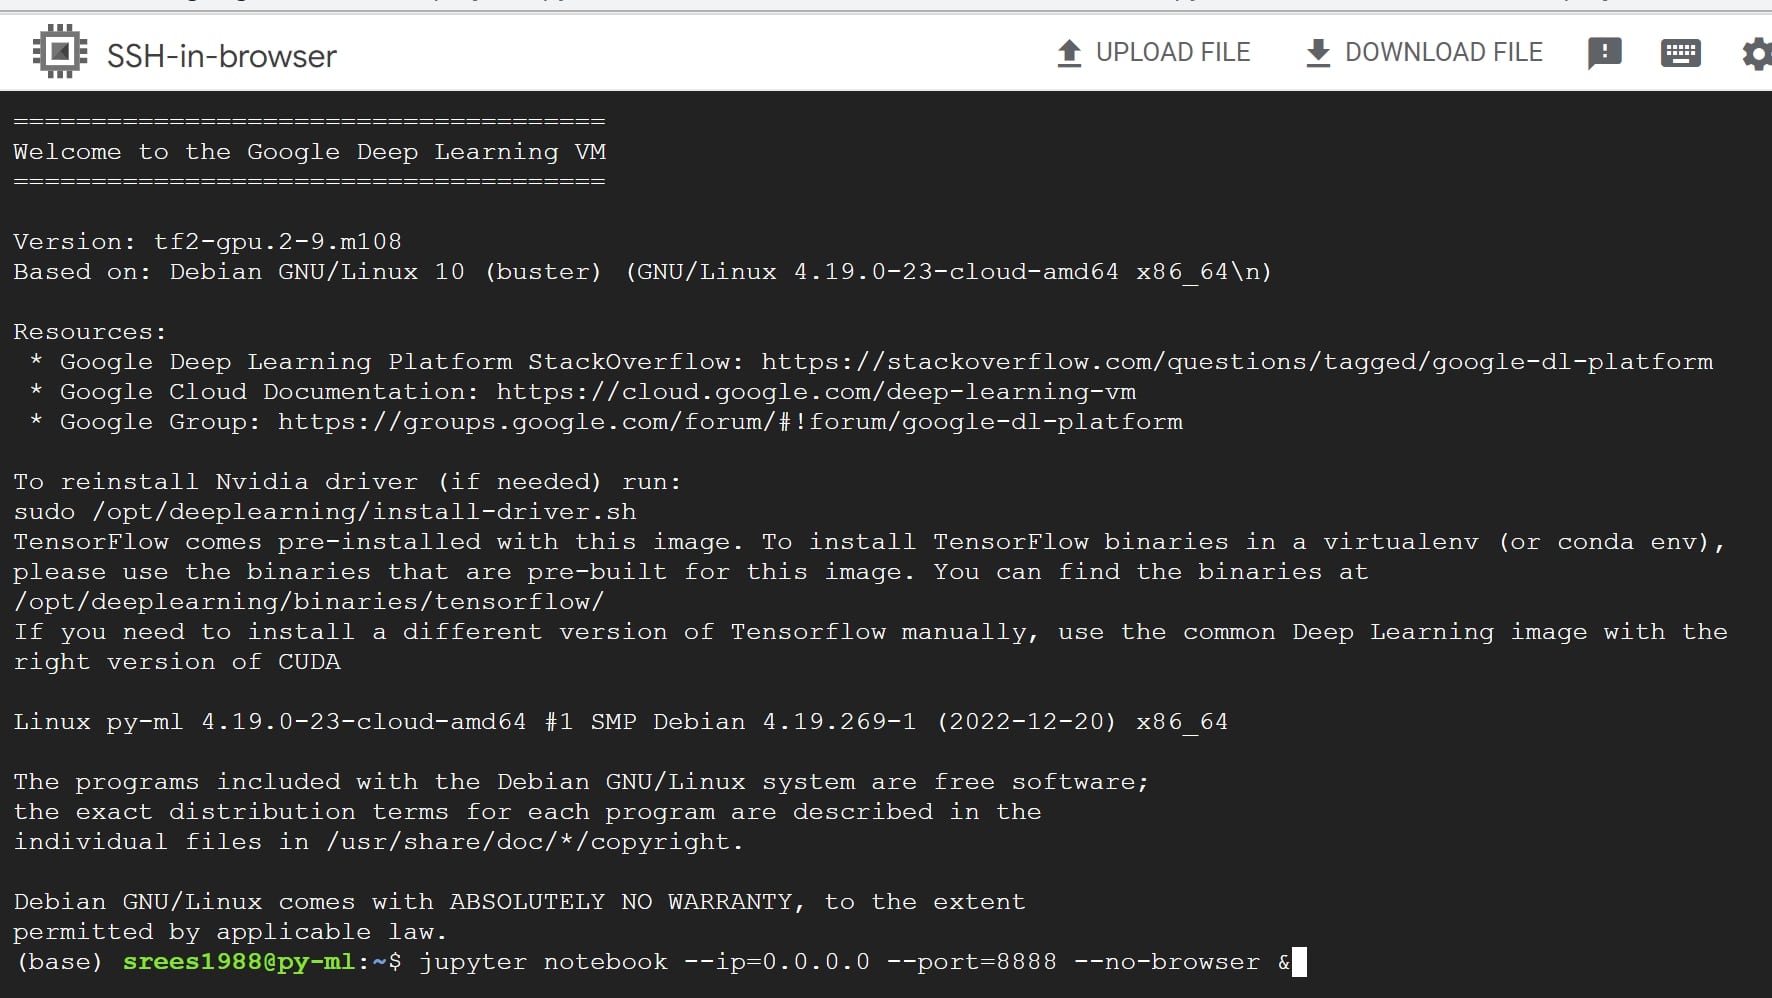
To access Jupyter Notebook through your browser, use the following URL format: http://[External IP]:8888. For example, if the External IP of the recently configured virtual machine instance is 35.185.161.49, then our Jupyter Notebook URL would be: http://35.185.161.49:8888/
When accessing Jupyter Notebook for the first time, it might prompt you for a token. You can find this token in the SSH terminal. Simply copy and paste the token, press Enter, and voila!
Step 3. Schedule and run Python scripts using cron:
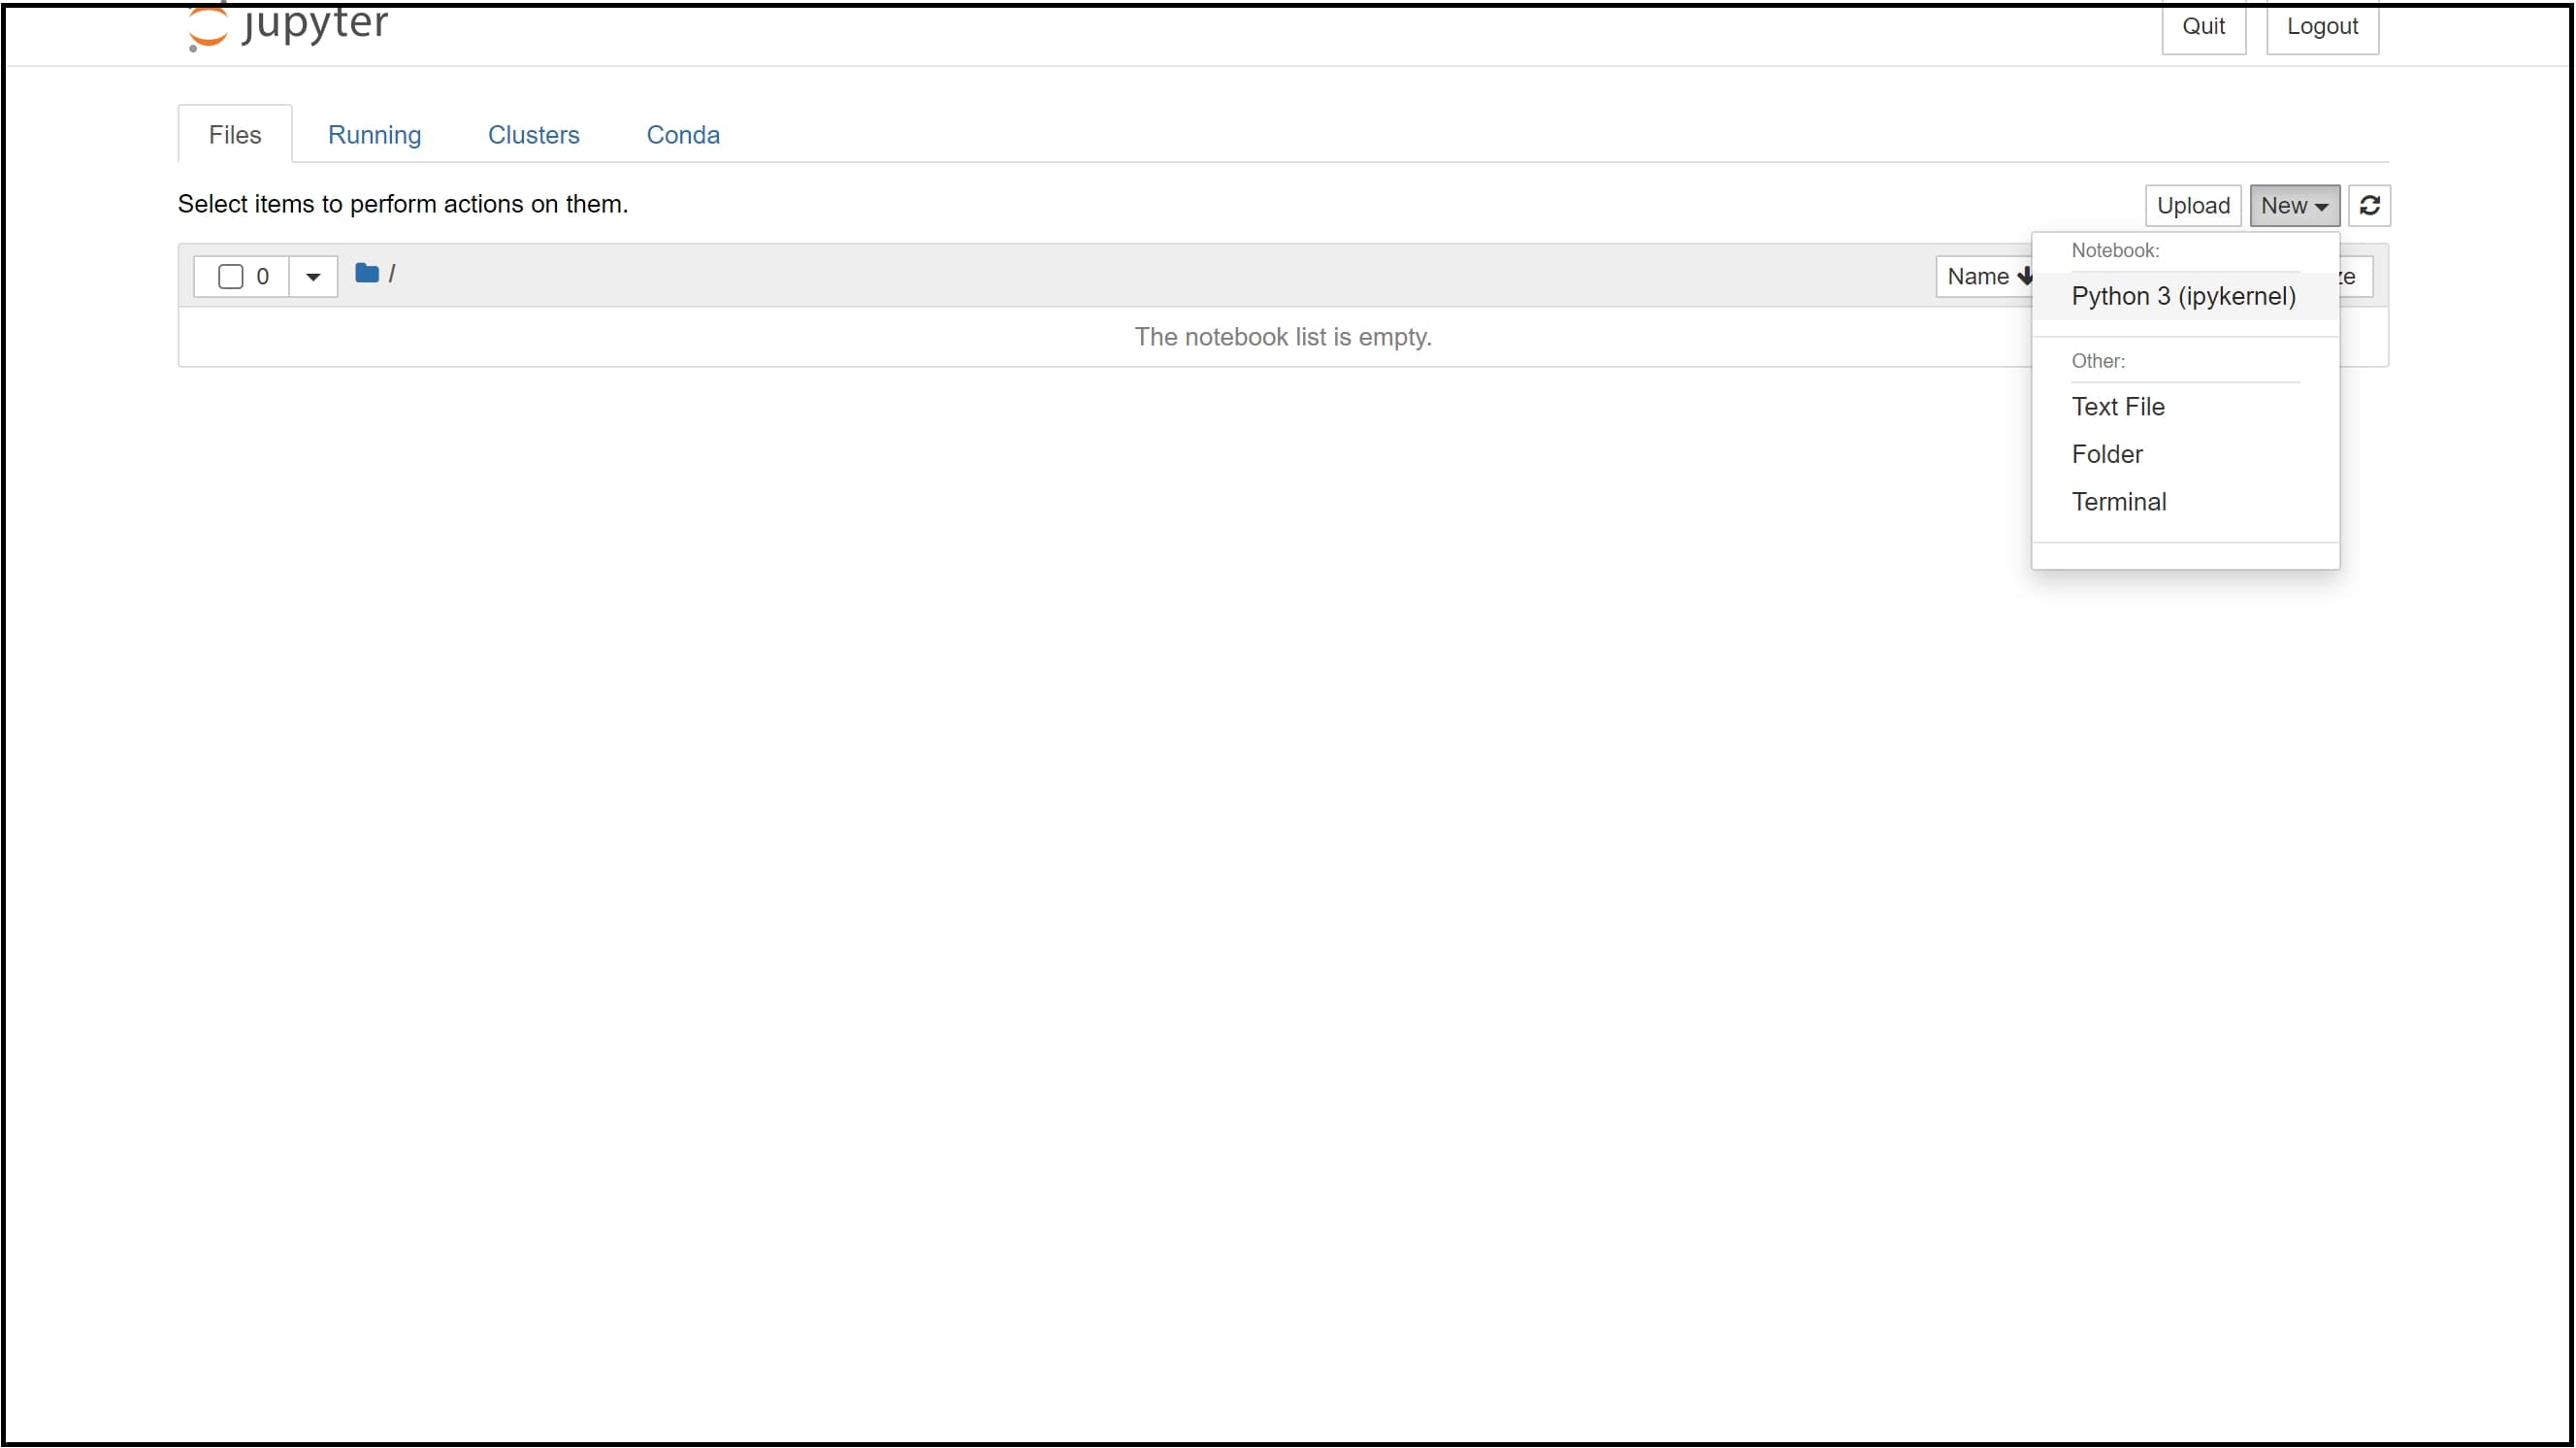
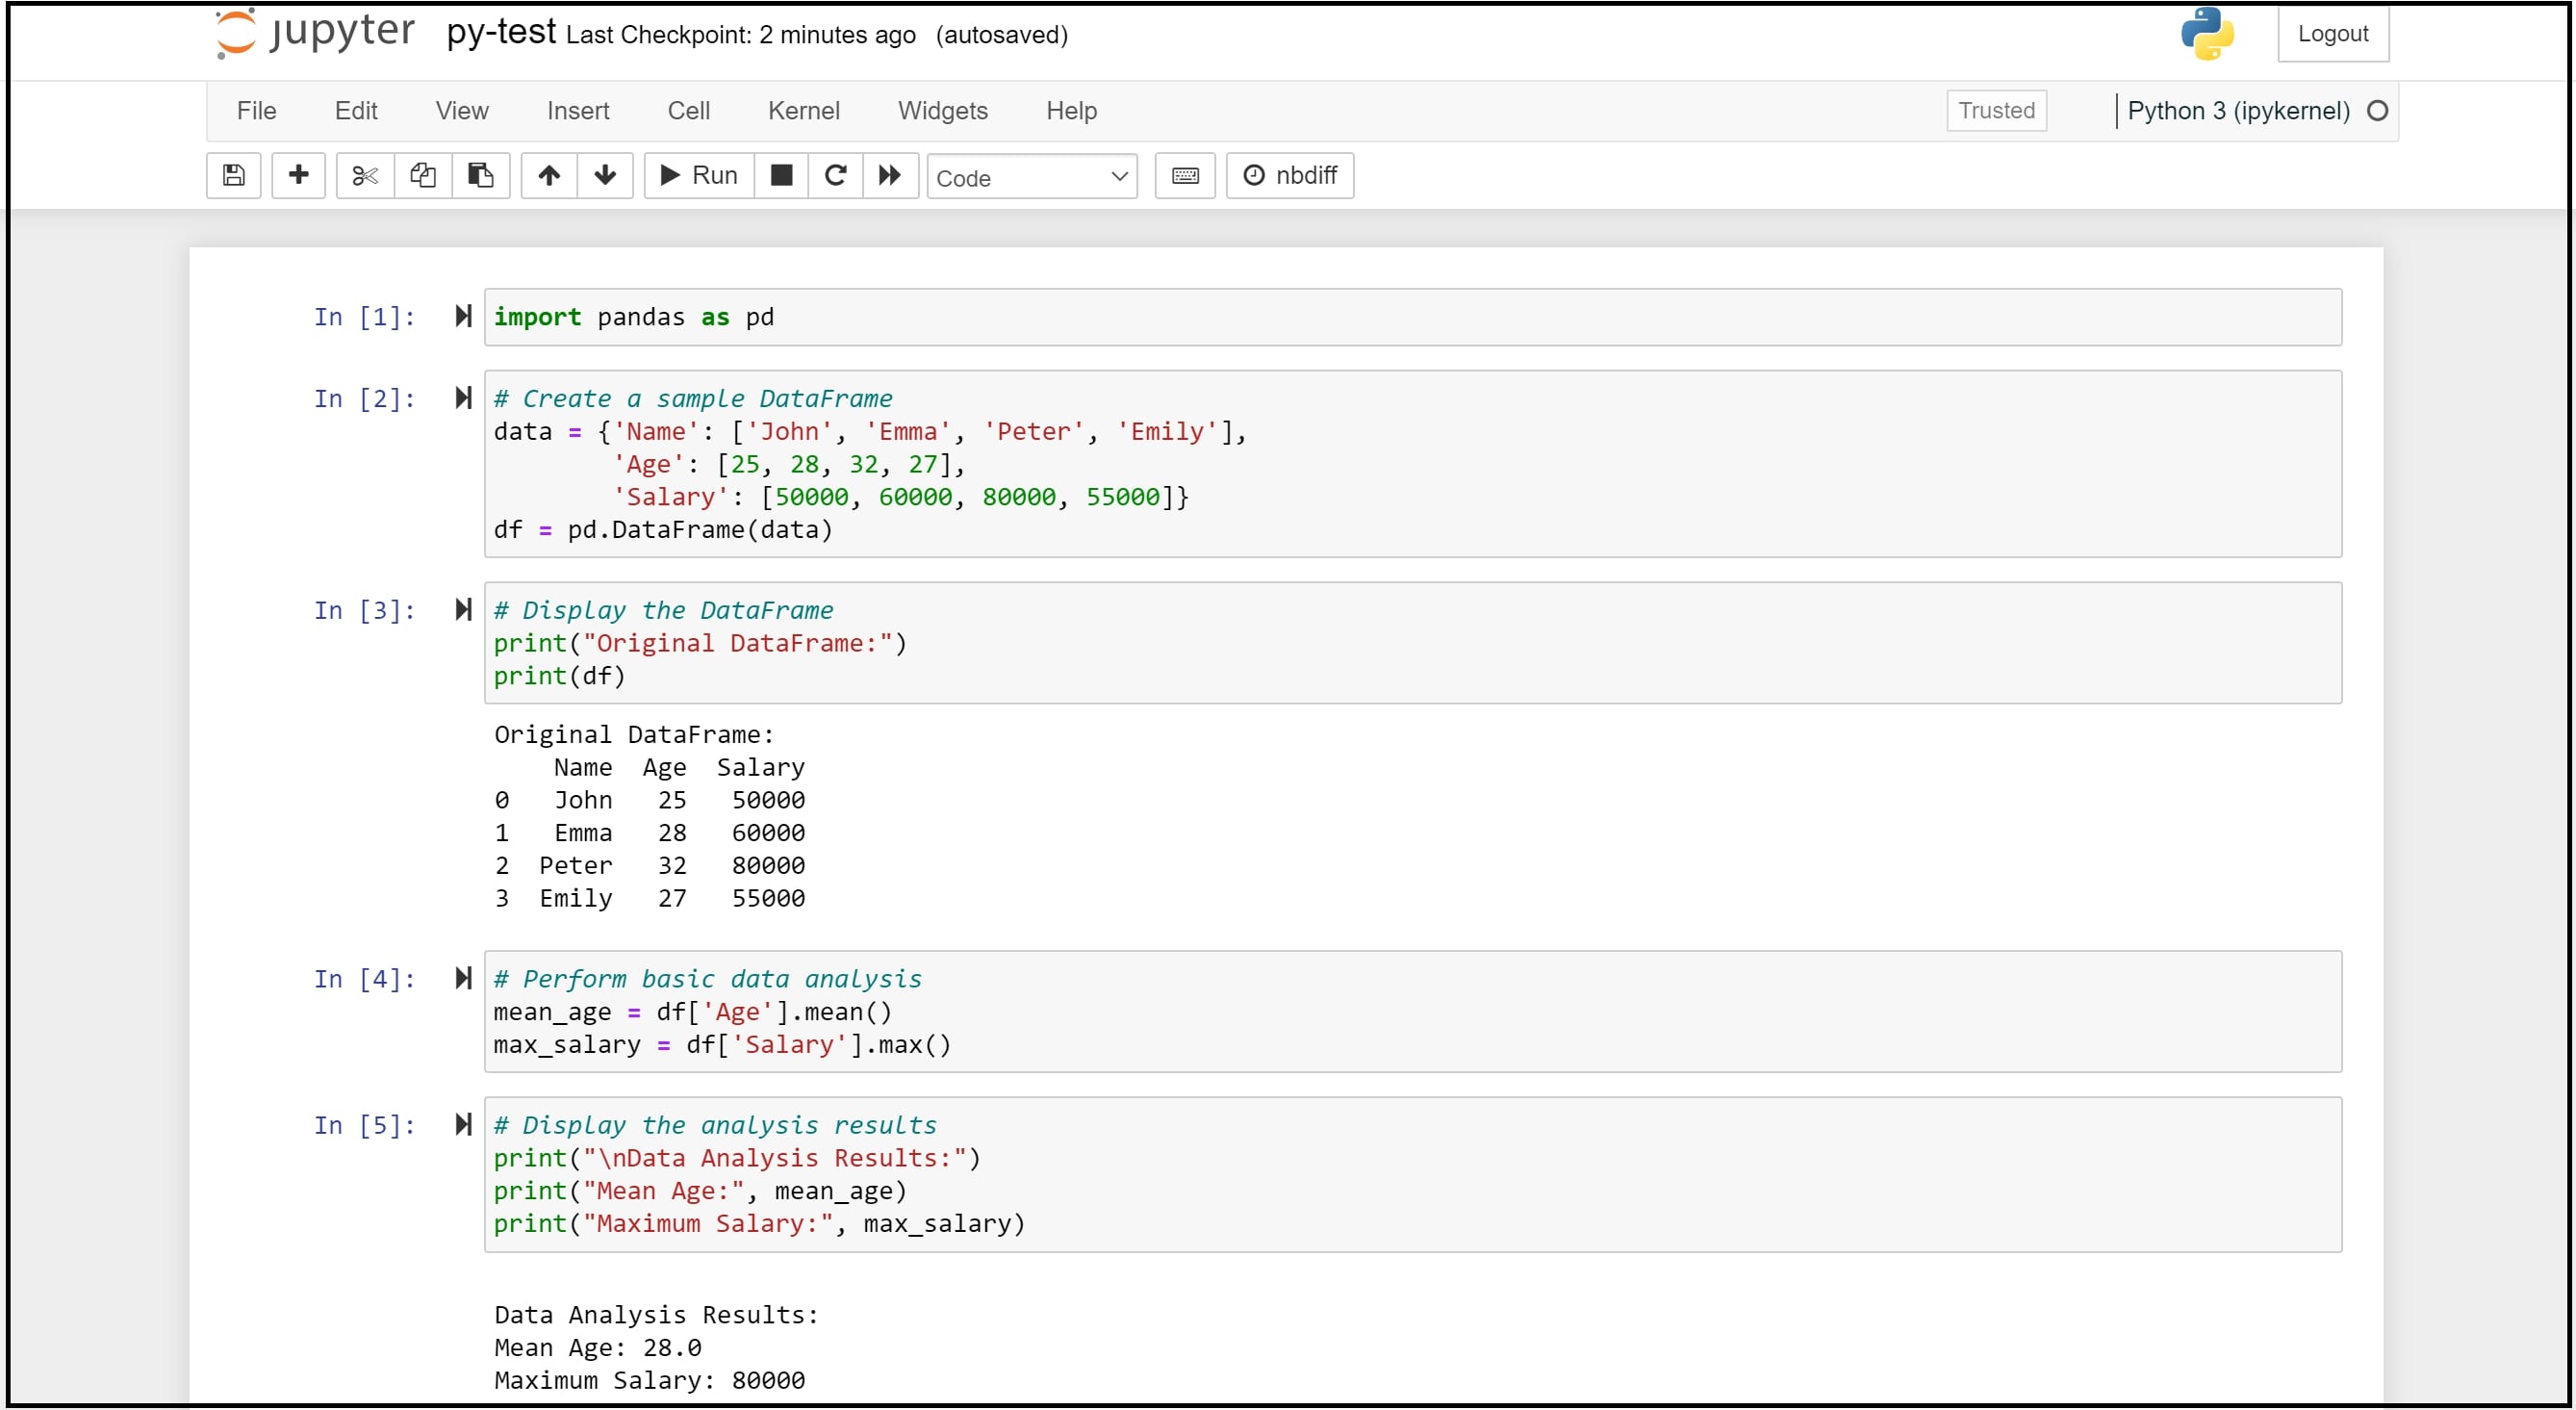
For the sake of demonstration, I have written a sample test file to showcase how we can automate Python scripts within the same Linux virtual machine instance that we configured earlier.
import pandas as pd


# Create a sample DataFrame
data = {'Name': ['John', 'Emma', 'Peter', 'Emily'],
        'Age': [25, 28, 32, 27],
        'Salary': [50000, 60000, 80000, 55000]}
df = pd.DataFrame(data)


# Display the DataFrame
print("Original DataFrame:")
print(df)


# Perform basic data analysis
mean_age = df['Age'].mean()
max_salary = df['Salary'].max()


# Display the analysis results
print("\nData Analysis Results:")
print("Mean Age:", mean_age)
print("Maximum Salary:", max_salary)
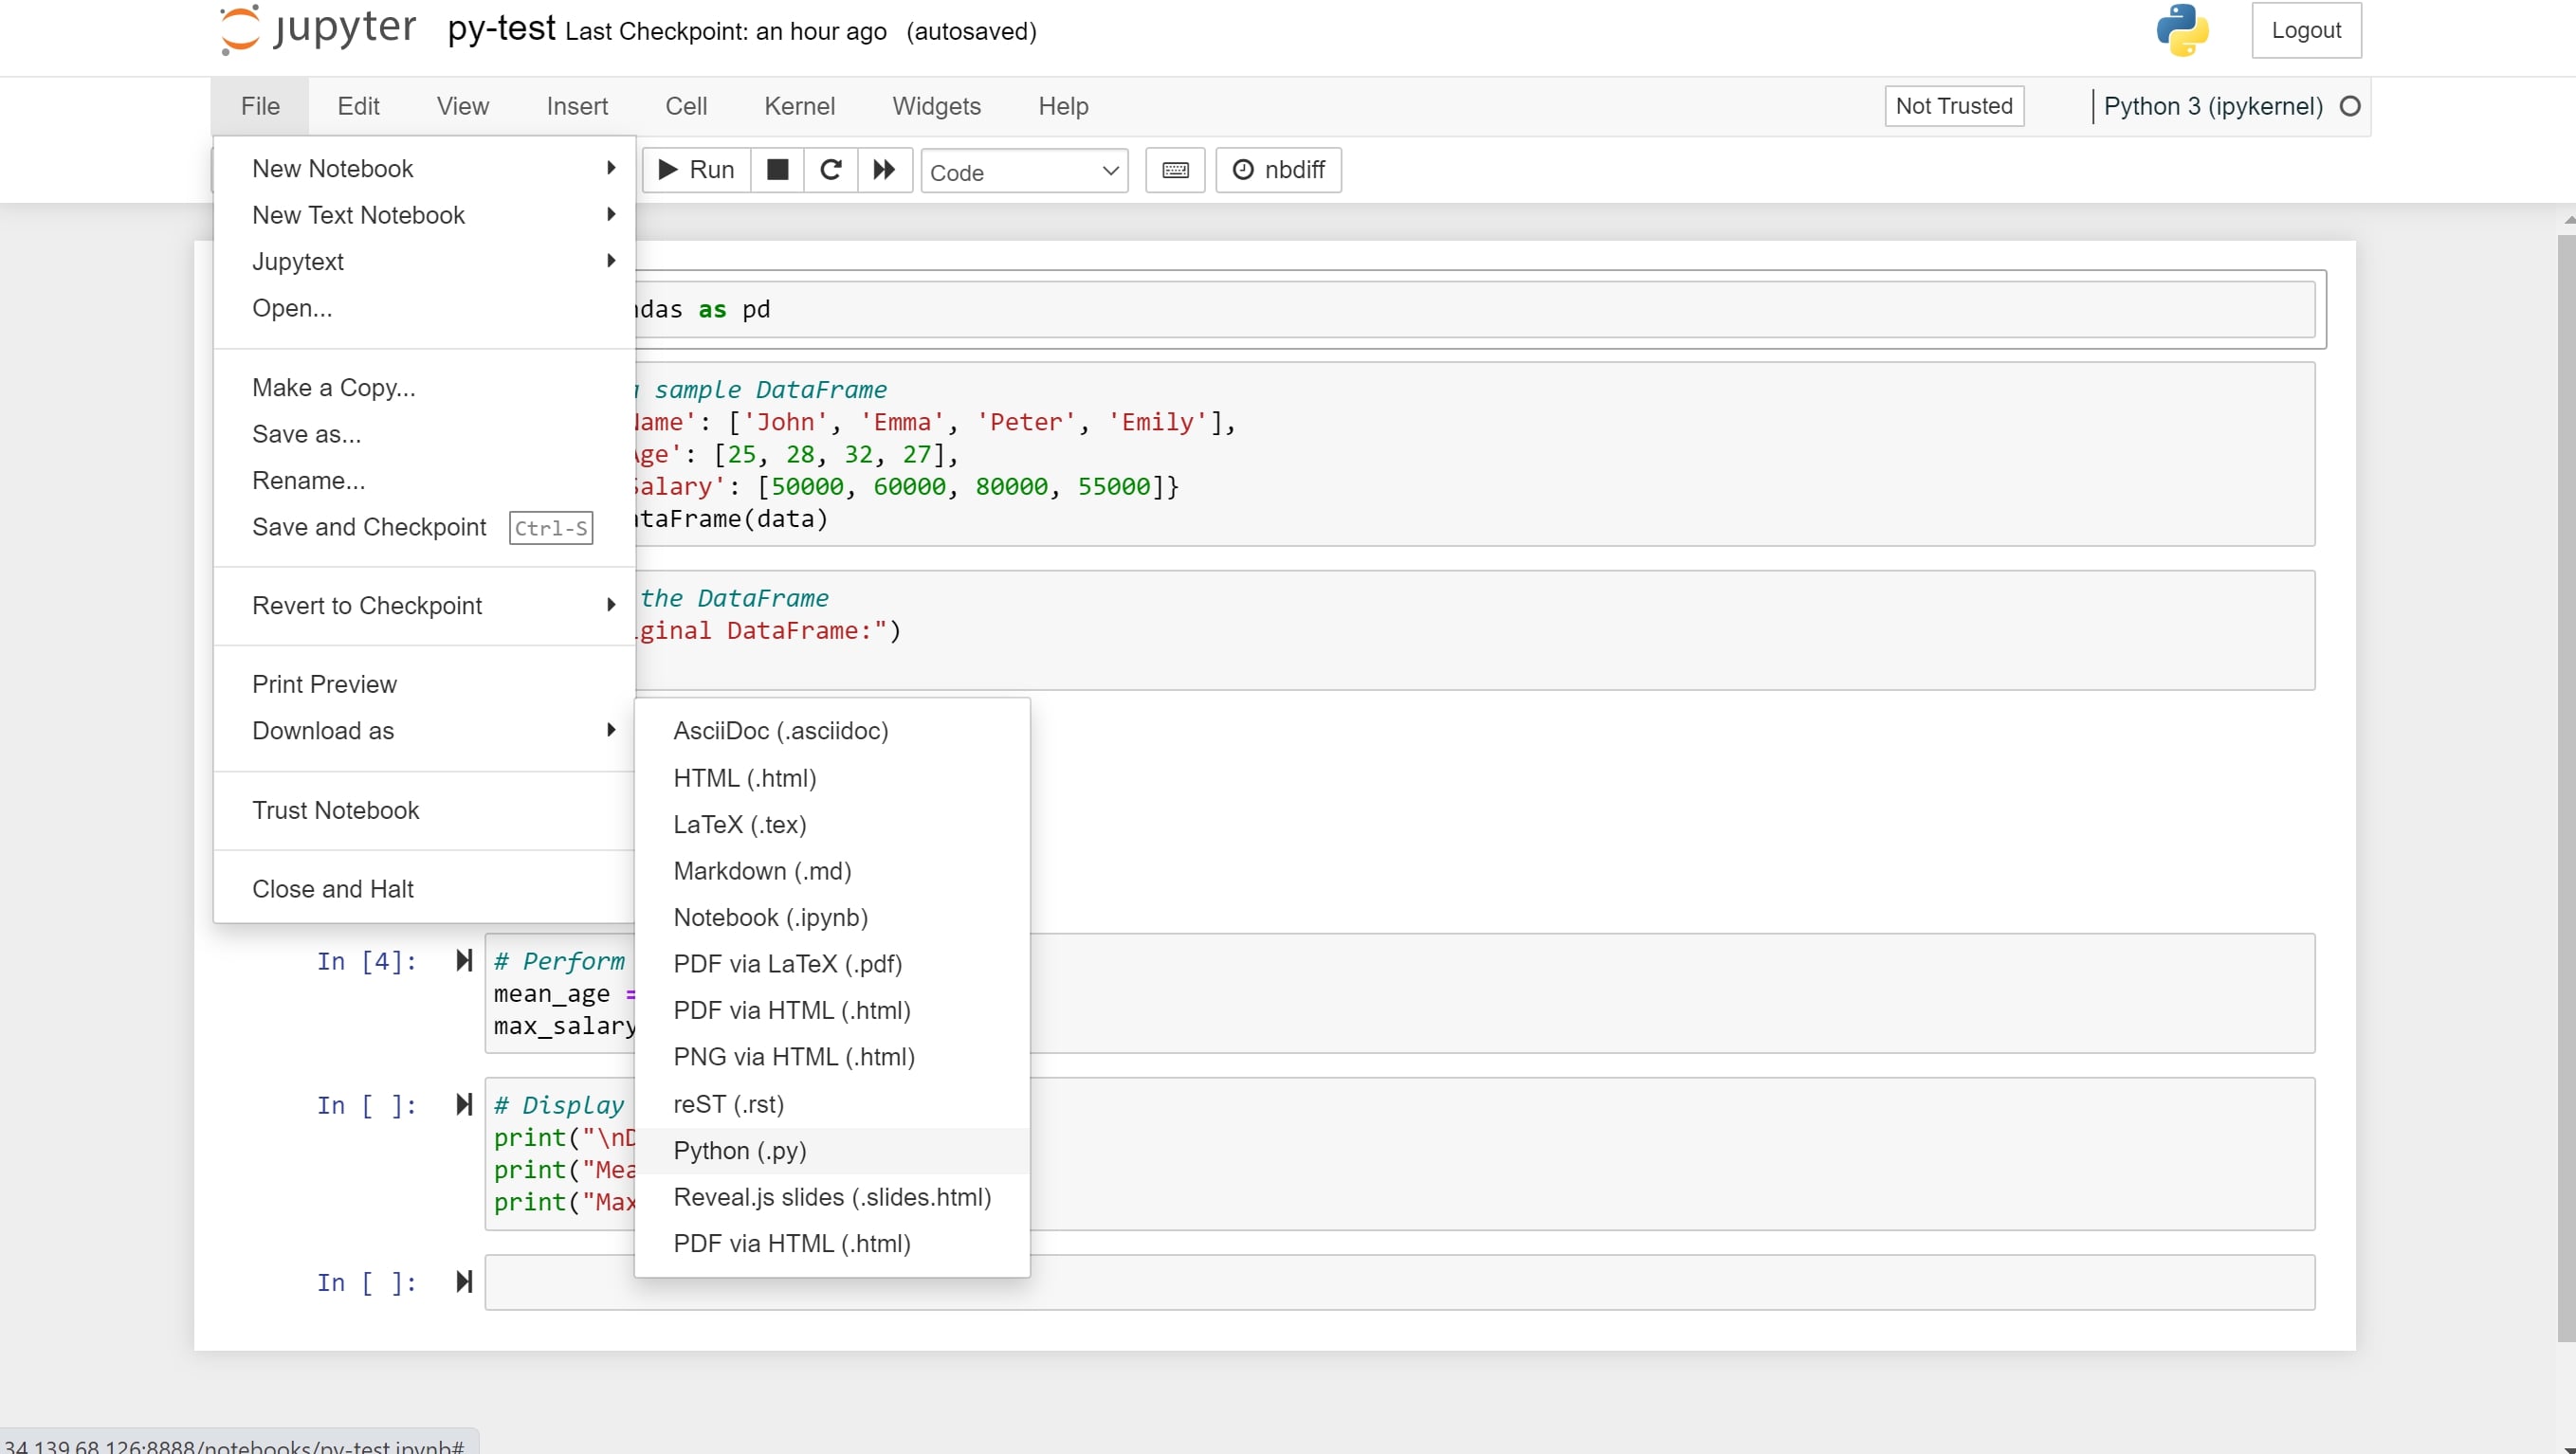
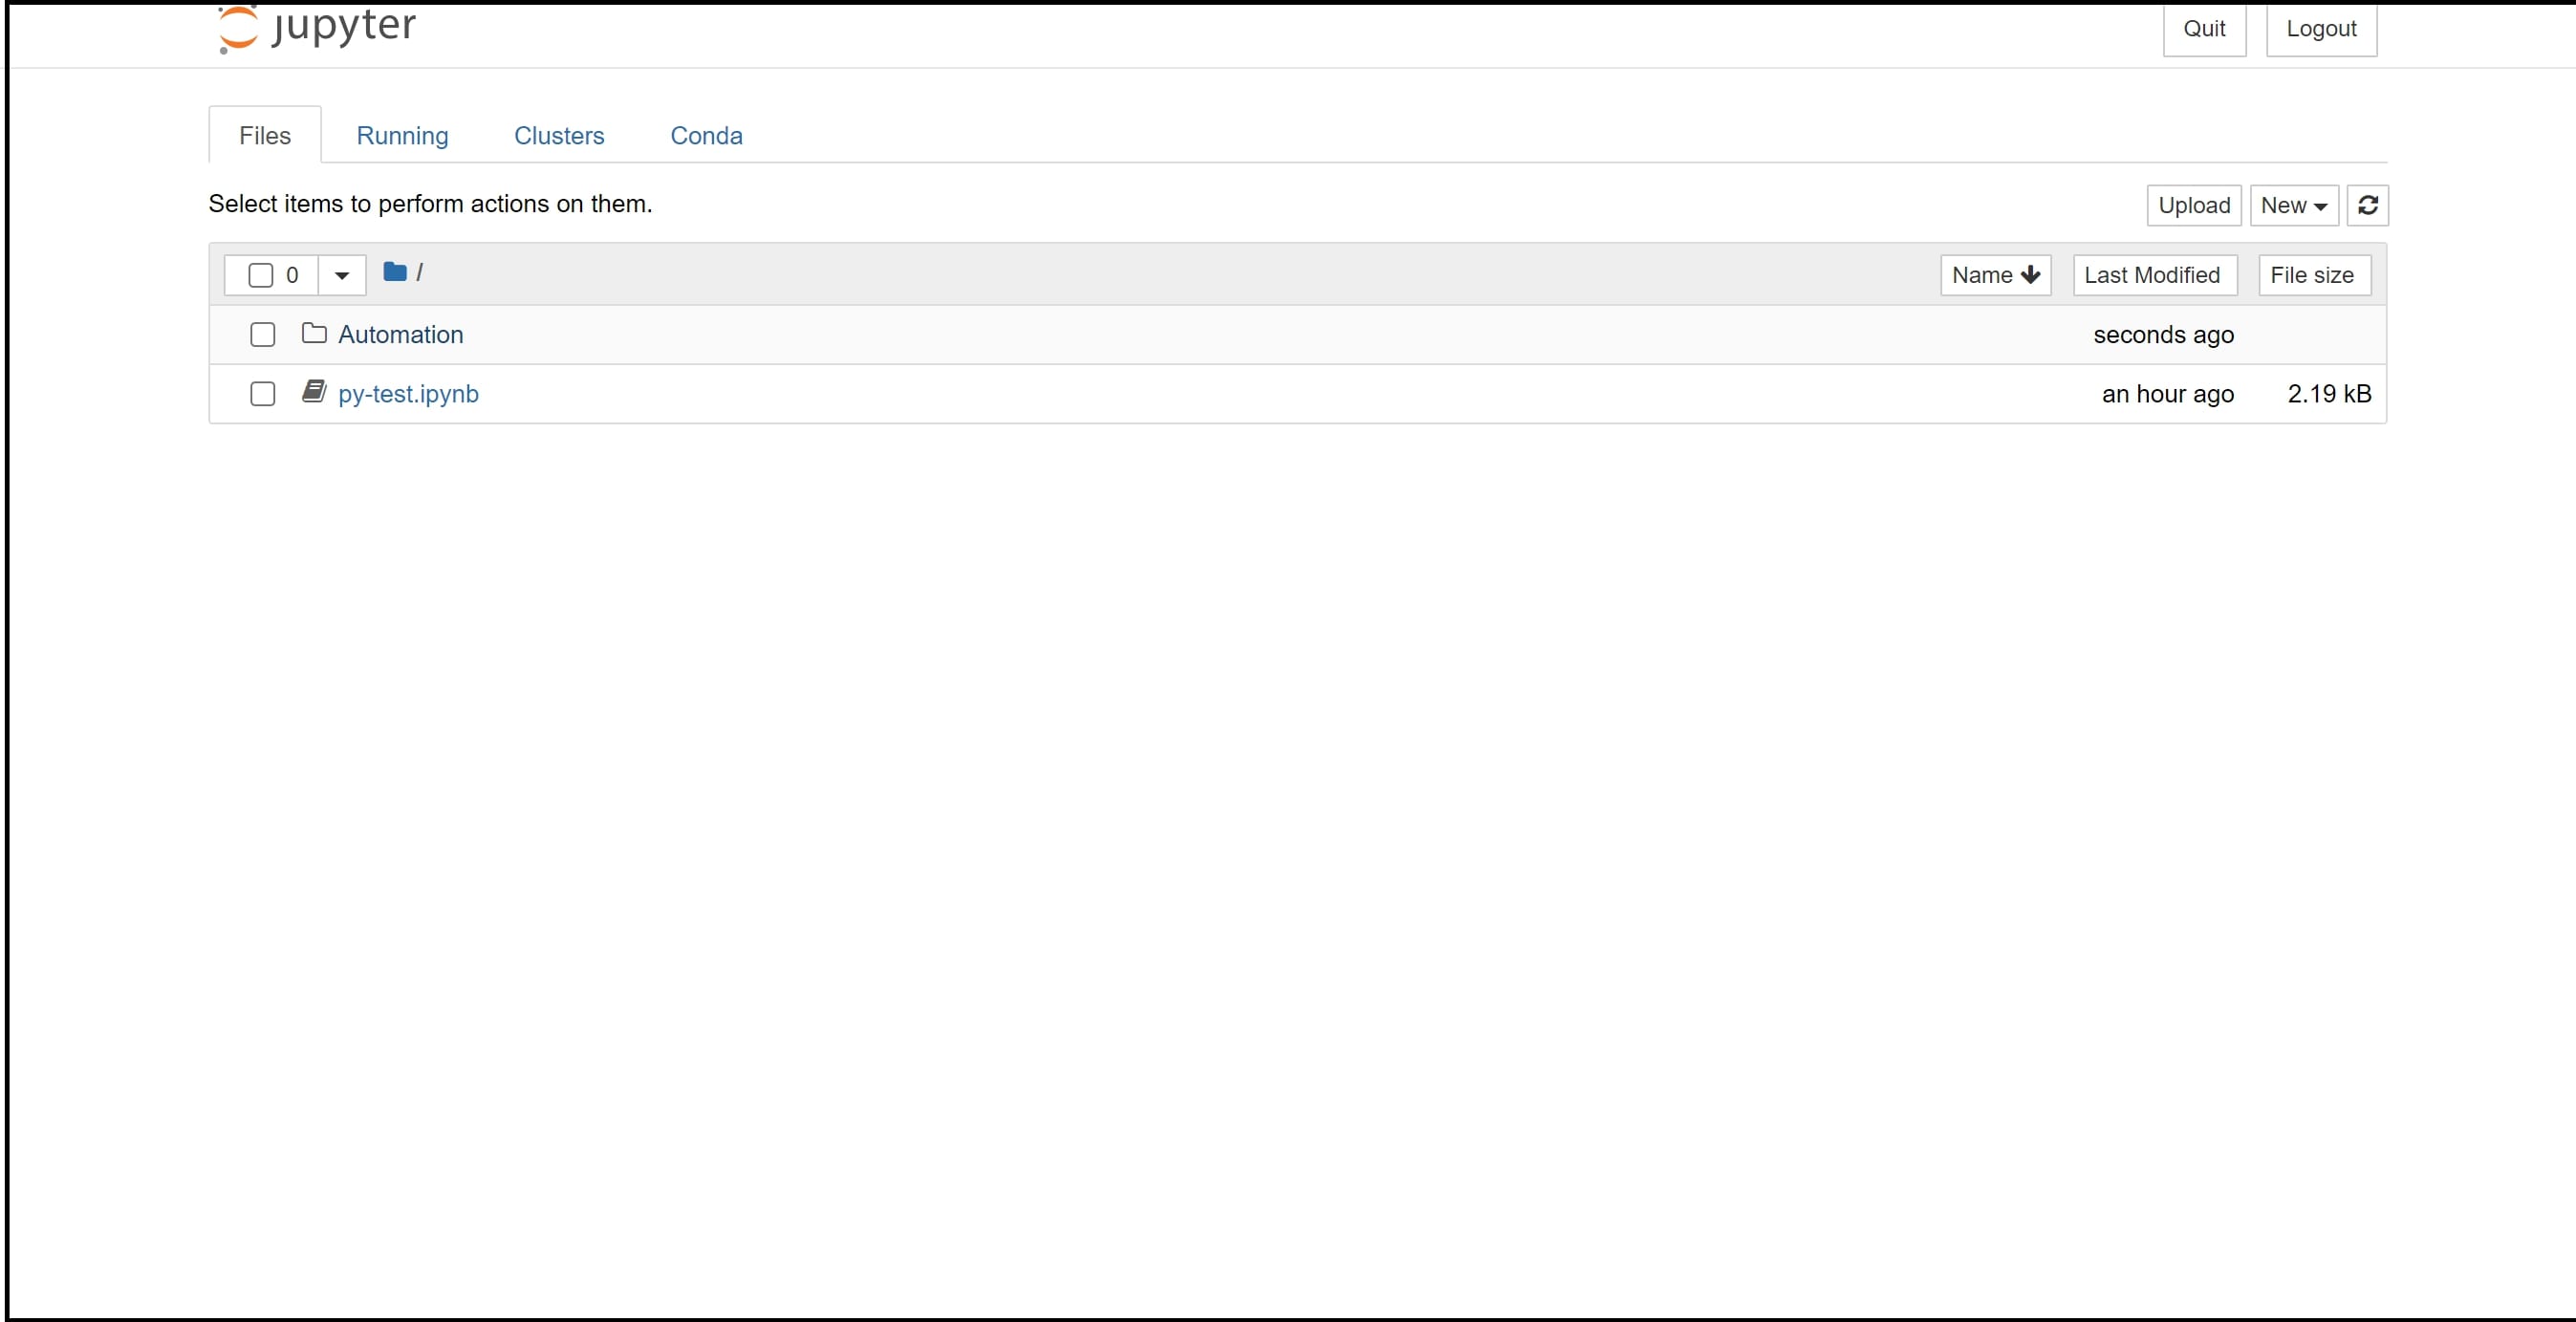
Save the file as ‘py-test.ipynb’ and download it as a Python file. Then, upload it to a newly created folder called ‘Automation’.
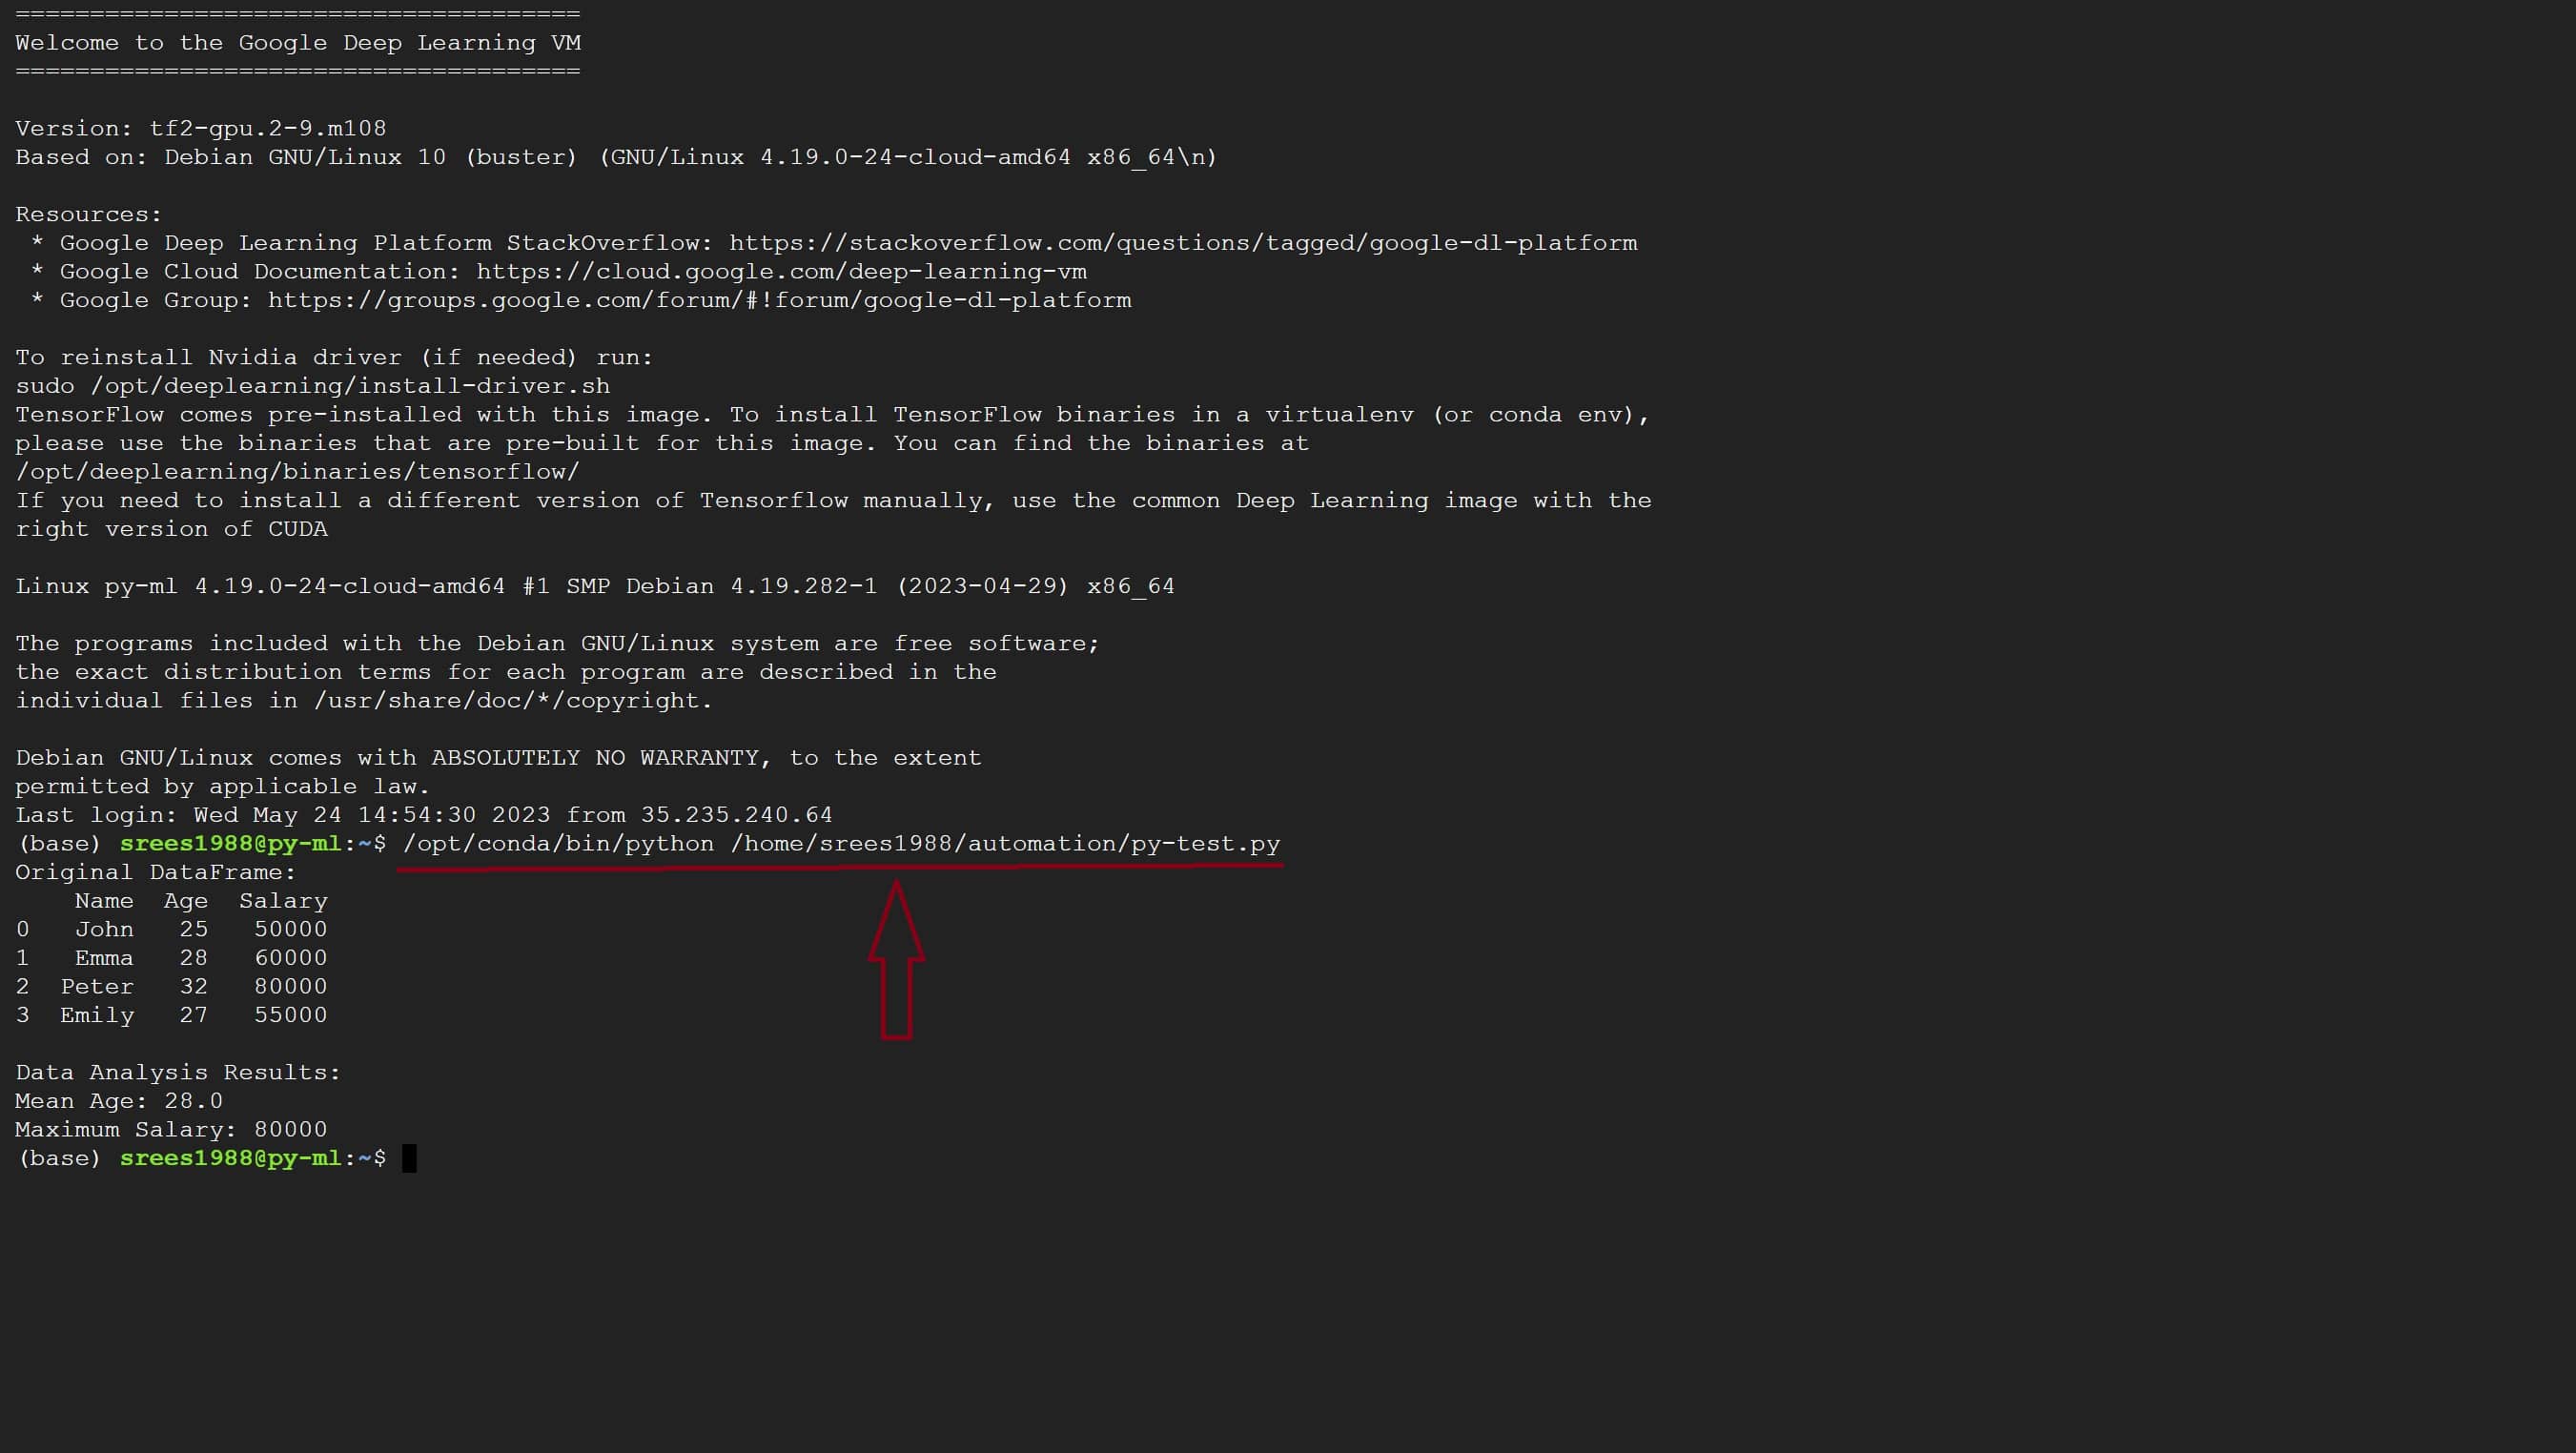
Now, go back to the SSH terminal and try running the file. You should be able to see the results being printed on the screen, which indicates that you can now run Python scripts successfully on the Linux server hosted on Google Cloud!
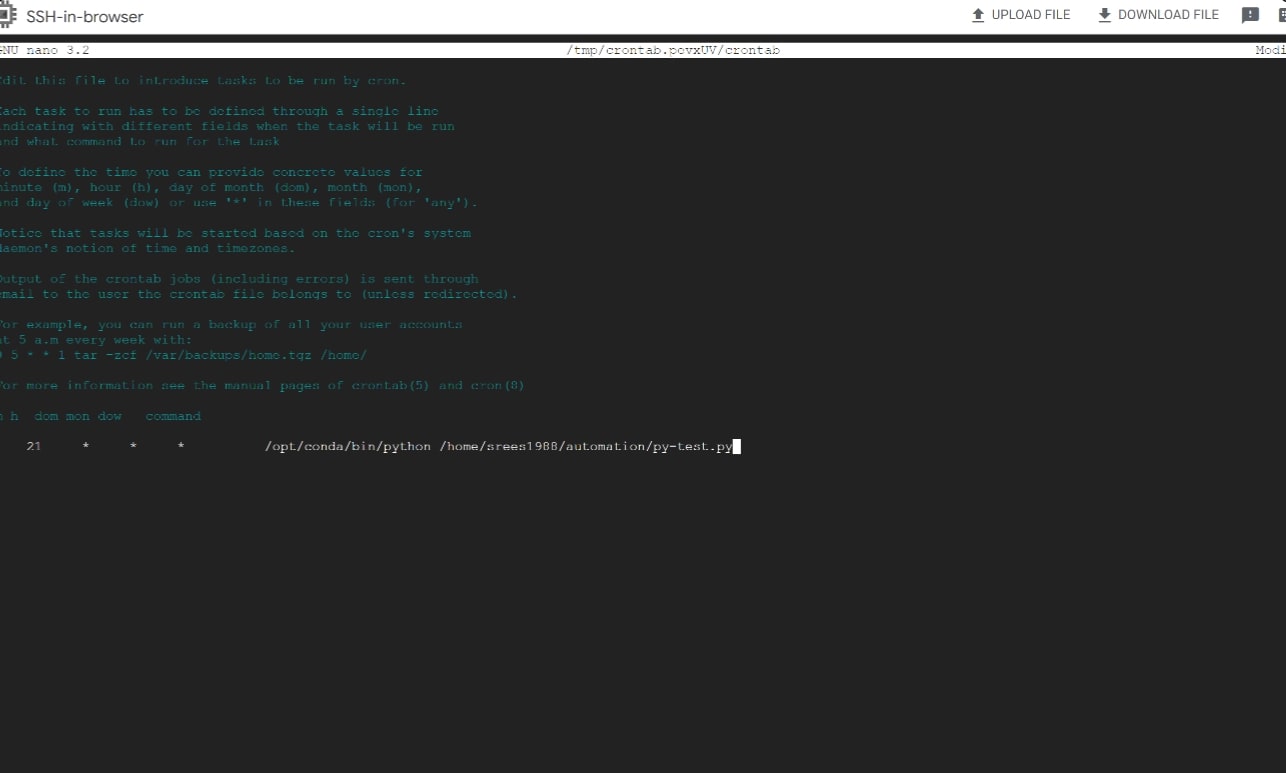
If you would like to schedule this script, follow these steps: 1. Open the SSH terminal and type ‘crontab -e’. 2. Key in the time and frequency of refresh. For instance, here, I have chosen to run the script daily at 9:30 PM UTC. Refer to this page to learn how you can schedule cron jobs.
Using crontab to schedule scripts can help automate analytics and machine learning pipelines, ensuring that your data is always up-to-date and your models are accurate.
Lastly, if you would like to set up R servers on Google Cloud, please read my blog on ‘Setting up R Servers’ that I published a few years ago.
Step 4: What’s Next?
I hope you have successfully installed Jupyter Notebook on Google Cloud by now. Here are a few suggestions for expanding your data modeling and predictive analytics workflow to a larger scale:
1) Firstly, try to encrypt the URL using Let’s Encrypt.
2)Take data from internal sources such as CRM databases or external sources like Nielsen Ratings, Facebook, and Google Ad sets, and transfer, modify, and load it into the Google Cloud Compute Engine.
3) Create data models using SQL, R, or Python languages.
4) Develop machine learning algorithms, whether they are supervised, unsupervised, or reinforcement, utilizing the data model sourced from the cloud.
5) Implement the complete workflow using CRON jobs to make it production-ready.
6) Save the dataset in a cloud-based database. If required, expose it as a REST API endpoint.
7) Finally, create a business intelligence (BI) dashboard that presents the predictive model in a visual format. This could involve forecasting future sales, predicting churn rates & Life Time Value, or analyzing customer reviews. If you’re interested, you can also integrate these live predictive BI models into web or mobile applications.
Congratulations if you have made it this far! I think that’s pretty much everything I would like to convey for now. I’ll write to you soon.
Thank you.