R Studio Server on Google Cloud
05 January 2020
An excerpt from an article written by Sree, published in ‘Towards Data Science’ Journal.
Objective
To set up a fully operational machine learning Server on Google Cloud Compute Engine’s virtual machine instance.
Details
In a real-world scenario, cloud computing and machine learning go hand-in-hand to build, transform and scale predictive modelling projects. Being a Linux server application, R Studio server is one of the best solutions that could be hosted on Google Cloud (or Amazon Web Service or Azure) to automatically process large volumes of data in SQL/ R/ Python in a centralized manner. Here’s a step-by-step approach on how to configure a fully functional R Studio Server on Google Cloud:
1) Configure a virtual machine instance (Ubuntu OS) on Google Cloud.
2) Install R and R Studio Server on the Virtual Machine.
3) Create users and groups.
4) Schedule and run R scripts using cronR package.
Step 1. Configure a virtual machine instance (Ubuntu OS) on Google Cloud:
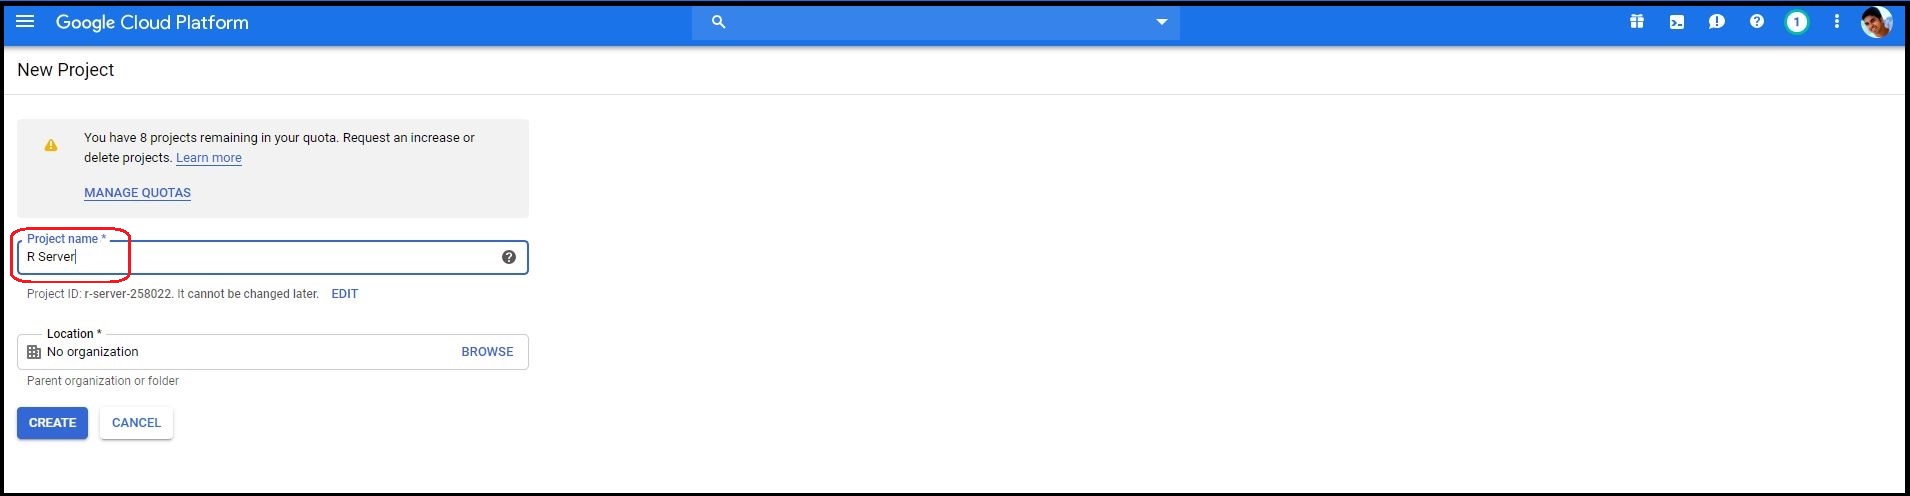
Step 1.1. Create a Google Cloud Project: Sign in to Google Cloud Console and create a project.
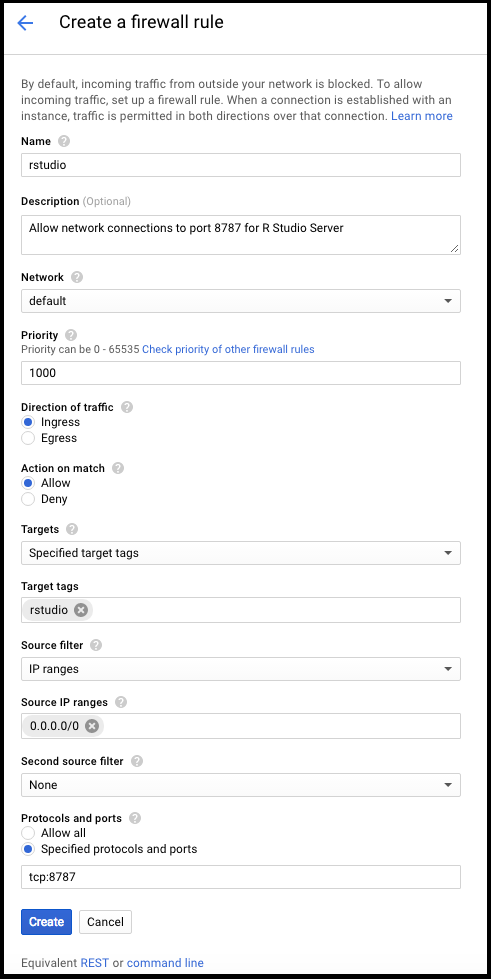
Step 1.2. Create a firewall rule: Create a firewall rule in the Google Cloud Compute Engine by navigating to the ‘Firewall rules’ under ‘Menu’ > ‘Networking’. Configure the following settings:
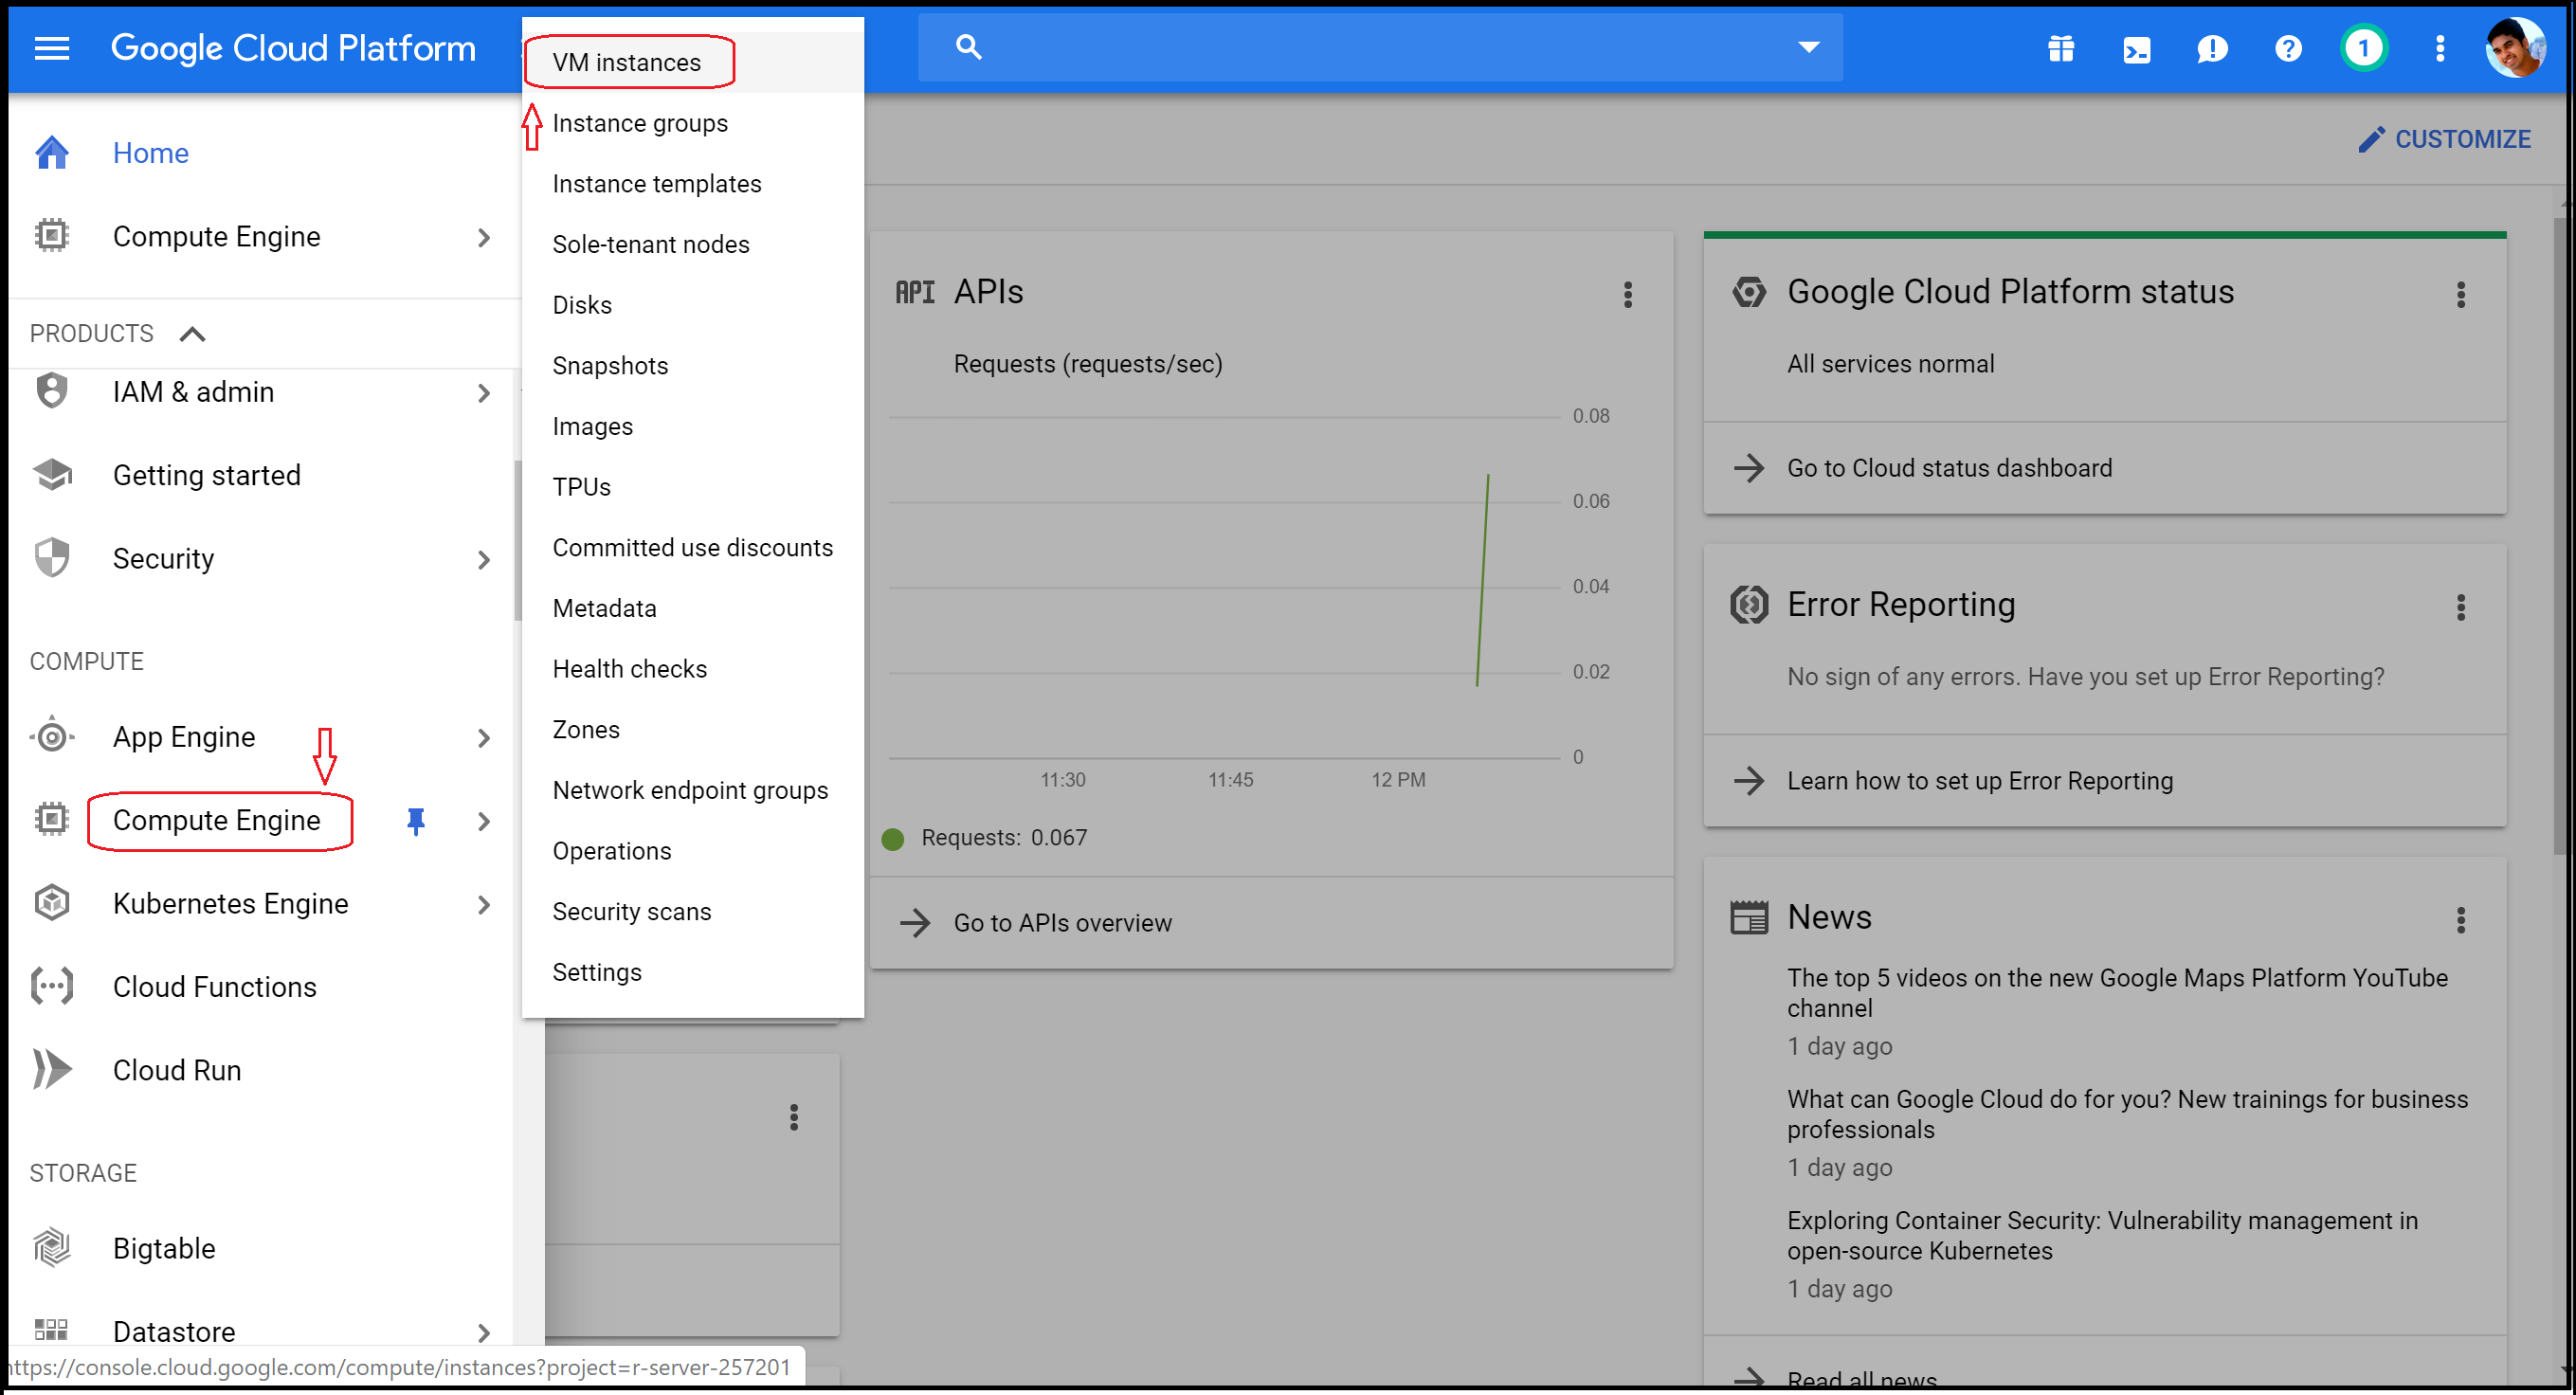
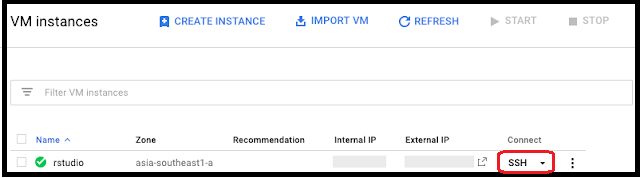
Step 1.3. Create a Virtual Machine Instance: Set up a new virtual machine on Google Cloud by navigating to ‘VM Instances’ under ‘Menu’ > ‘Compute Engine’.
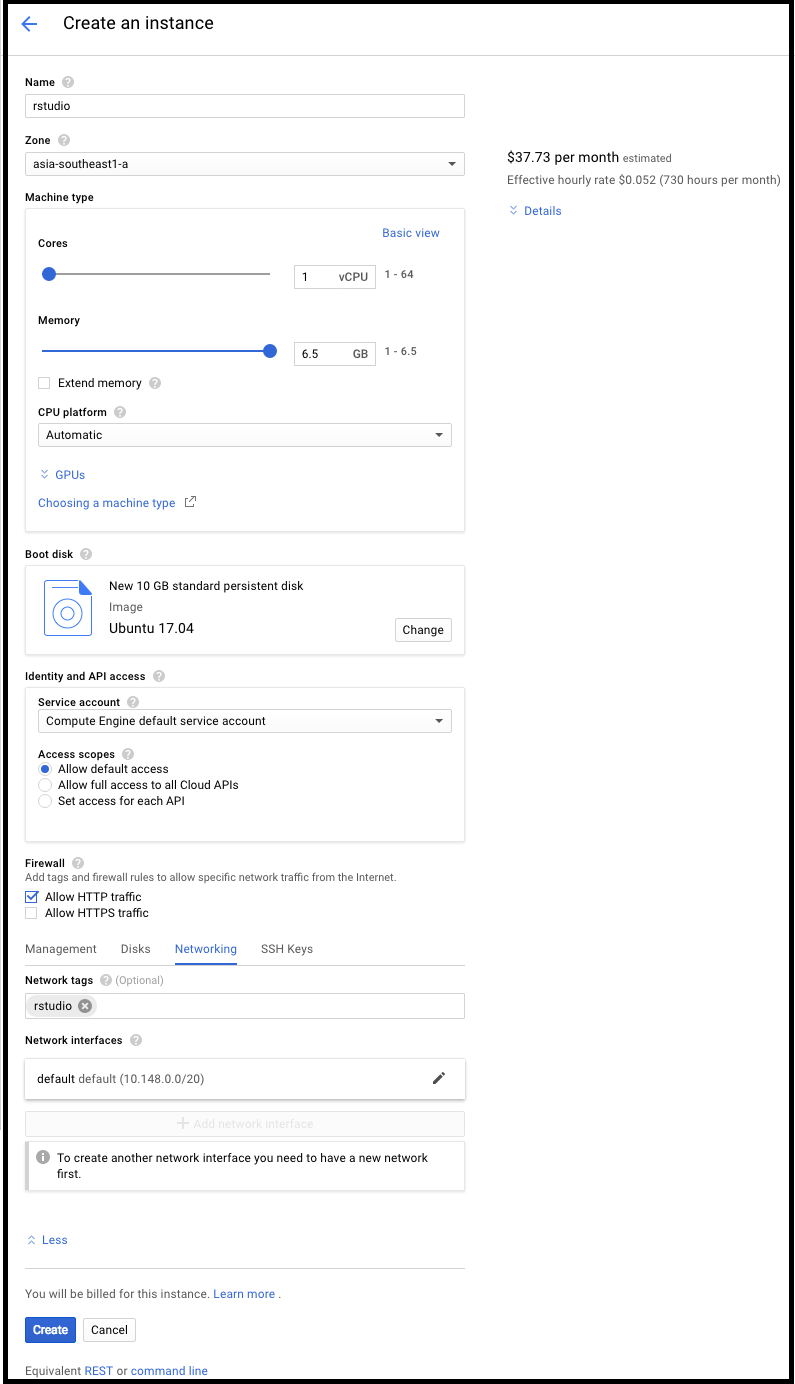
Step 1.4. Virtual Machine Configurations: Give a name to the new VM instance (ex: “rstudio”) and choose a zone that’s close to the zone of operation to reduce the network latency. Since R stores all of its working datasets in memory, try to give the VM instance as much memory as we can afford. Under “OS images”, choose one of the latest versions of Ubuntu that supports the OpenSSL 1.0. R Studio Server connects always through an unsecured HTTP connection. Therefore, under Firewall, “Allow HTTP traffic”. Lastly, click “Create” to launch the instance.
Step 2. Install R and R Studio Server on the Virtual Machine:
Step 2.1. SSH Connection: Click on “SSH” next to the new instance from Google Compute Engine’s VM instances window. This will launch the command prompt.
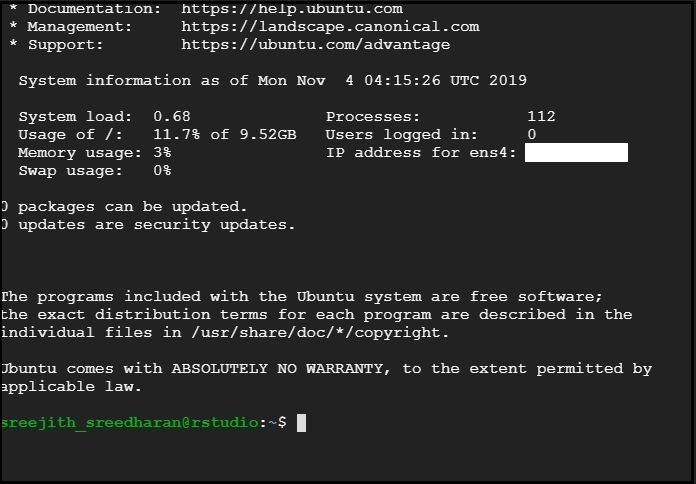
Step 2.2. Update apt: Update apt to make sure that we have the latest packages to use with Ubuntu.
sudo apt-get update
sudo apt-get upgrade
Step 2.3. Install R and R Studio Server:
sudo apt-get install r-base r-base-dev
Checkout the latest version of the RStudio Server before running the following lines of code. Install all the supporting packages:
sudo apt-get install gdebi-core
wget https://download2.rstudio.org/server/bionic/
amd64/rstudio-server-1.2.5019-amd64.deb
sudo gdebi rstudio-server-1.2.5019-amd64.deb
sudo apt-get install libcurl4-openssl-dev
libssl-dev libxml2-dev
Step 3. Create users and groups
One of the biggest benefits of using R studio server is that it gives us a window to collaborate with peers in a centralized cloud framework. Add users to the virtual machine instance so that others can work with the R Studio Server simultaneously.
Step 3.1. Create a group : Creating a group (ex: “marketing”) will make it easier to manage shared folders and files with the team.
sudo addgroup marketing
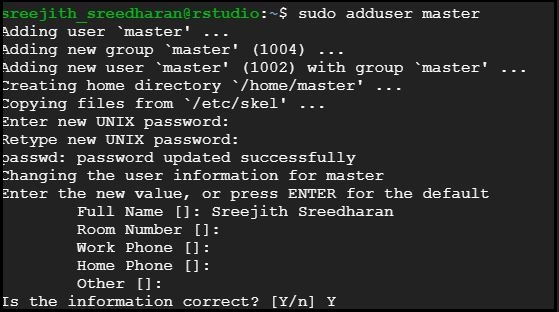
Step 3.2. Create a master user: The whole idea behind creating a master user is that while colleagues and peers will join or leave us, the “master user” would remain to own all the shared files.
sudo adduser master
Step 3.3. Create the shared folder:
cd /home/master
sudo mkdir shared_folder
sudo chown -R master:marketing shared_folder/
sudo chmod -R 770 shared_folder/
Step 3.4. Add users and link them to shared folder: Here I am adding Steve as an example to the recently created “marketing” group. Steve’s home folder has been linked to the ‘master user’s shared folder.
sudo adduser steve
sudo gpasswd -a steve marketing
su - steve
ln -s /home/master/shared_folder/home/steve/shared_folder
exit

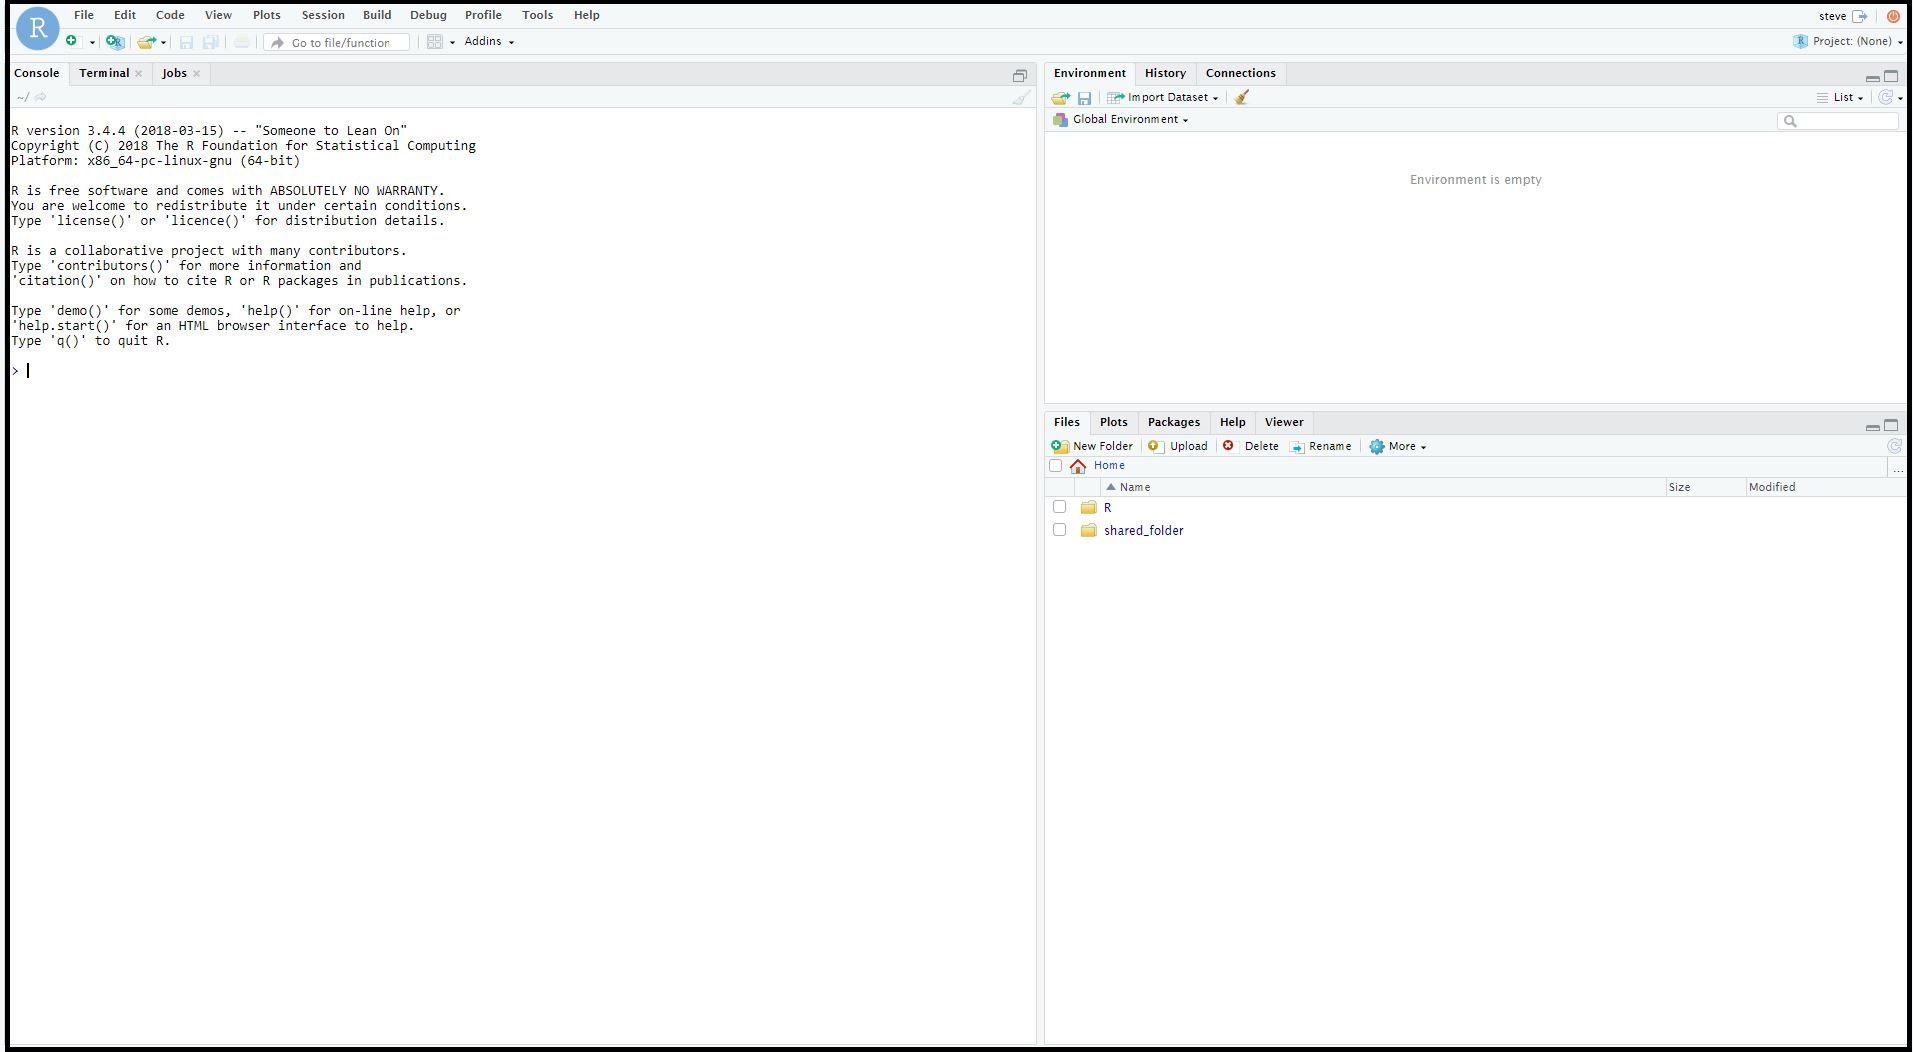
That’s it! We are good to use R Studio Server on Google Cloud. In order to open R studio Server on the browser, follow the URL syntax: http://[External IP]:8787. For example, if the External IP of the newly configured virtual machine instance is 35.185.161.49, then our R Studio Server URL would be: http://35.199.10.210:8787/
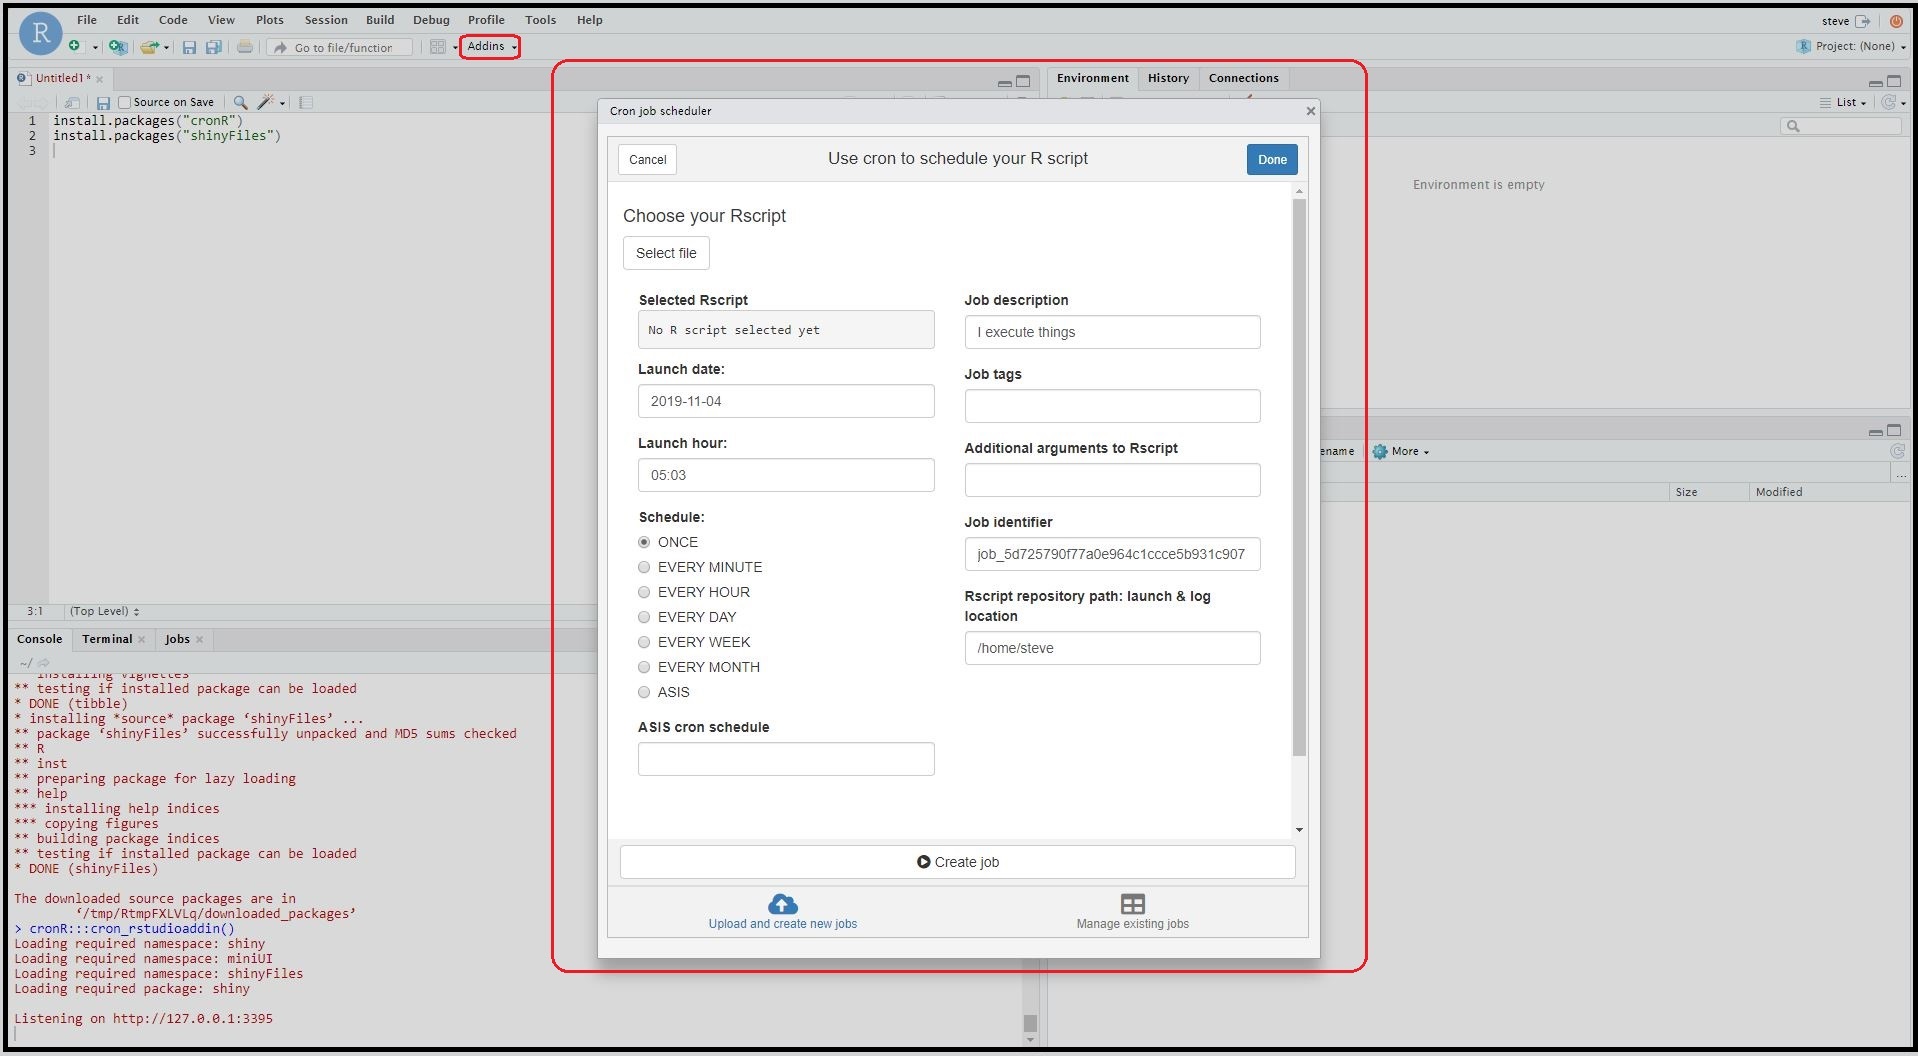
Step 4. Schedule and run R scripts using cronR package:
Install cronR package to generate the task scheduler in R Studio Server. Use the add-in to automate any scripts in the virtual machine instance.
install.packages("cronR")
install.packages("shinyFiles")
Step 5: What’s Next?
We just finished setting up the machine learning framework in the cloud. Here are some recommendations on what we could potentially do to scale up this data modeling and predictive analytics workflow:
1) Extract, transform, and load datasets from internal (CRM databases) or external data sources (third-party vendors like Nielsen Ratings or Facebook & Google Ad sets) into the Google Cloud Compute Engine.
2) Build data models in SQL, R, or Python (Use Reticulate and sqldf packages to source python/SQL scripts into R studio server).
3) Build supervised or unsupervised or reinforcement machine learning algorithms over the cloud-sourced data model. Productionize the end-to-end workflow using cronR package. Store the dataset in a cloud database.
4) Lastly, build a BI dashboard that visualizes the predictive model (could be anything from predicting the next month sales or churn rate to classifying the customer database using unsupervised cluster models). If interested, embed this live predictive BI model as a widget in web/mobile applications via REST API.
Feel free to reach out to me if you need any help in understanding the aforesaid configurations. Happy to share what I know! Hope this helps:)
About the Author
Sree is a Marketing Data Scientist and seasoned writer with over a decade of experience in data science and analytics, focusing on marketing and consumer analytics. Based in Australia, Sree is passionate about simplifying complex topics for a broad audience. His articles have appeared in esteemed outlets such as Towards Data Science, Generative AI, The Startup, and AI Advanced Journals. Learn more about his journey and work on his portfolio - his digital home.